
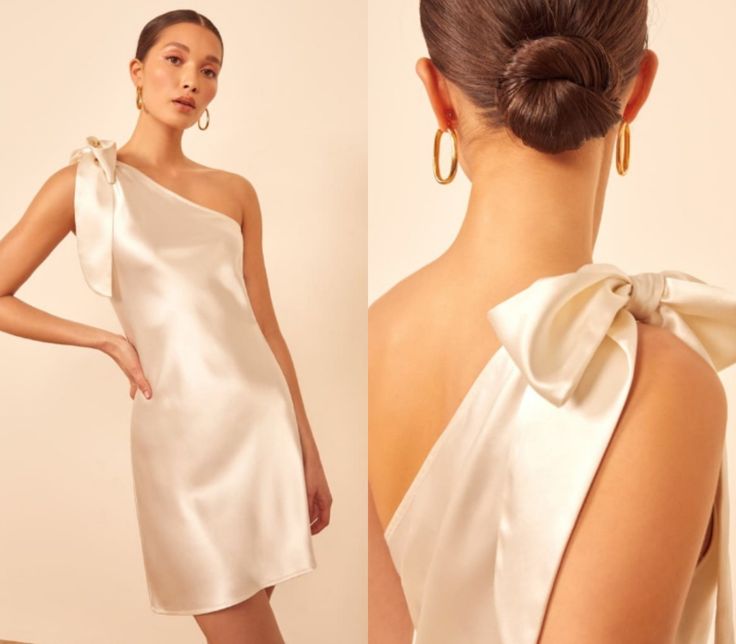
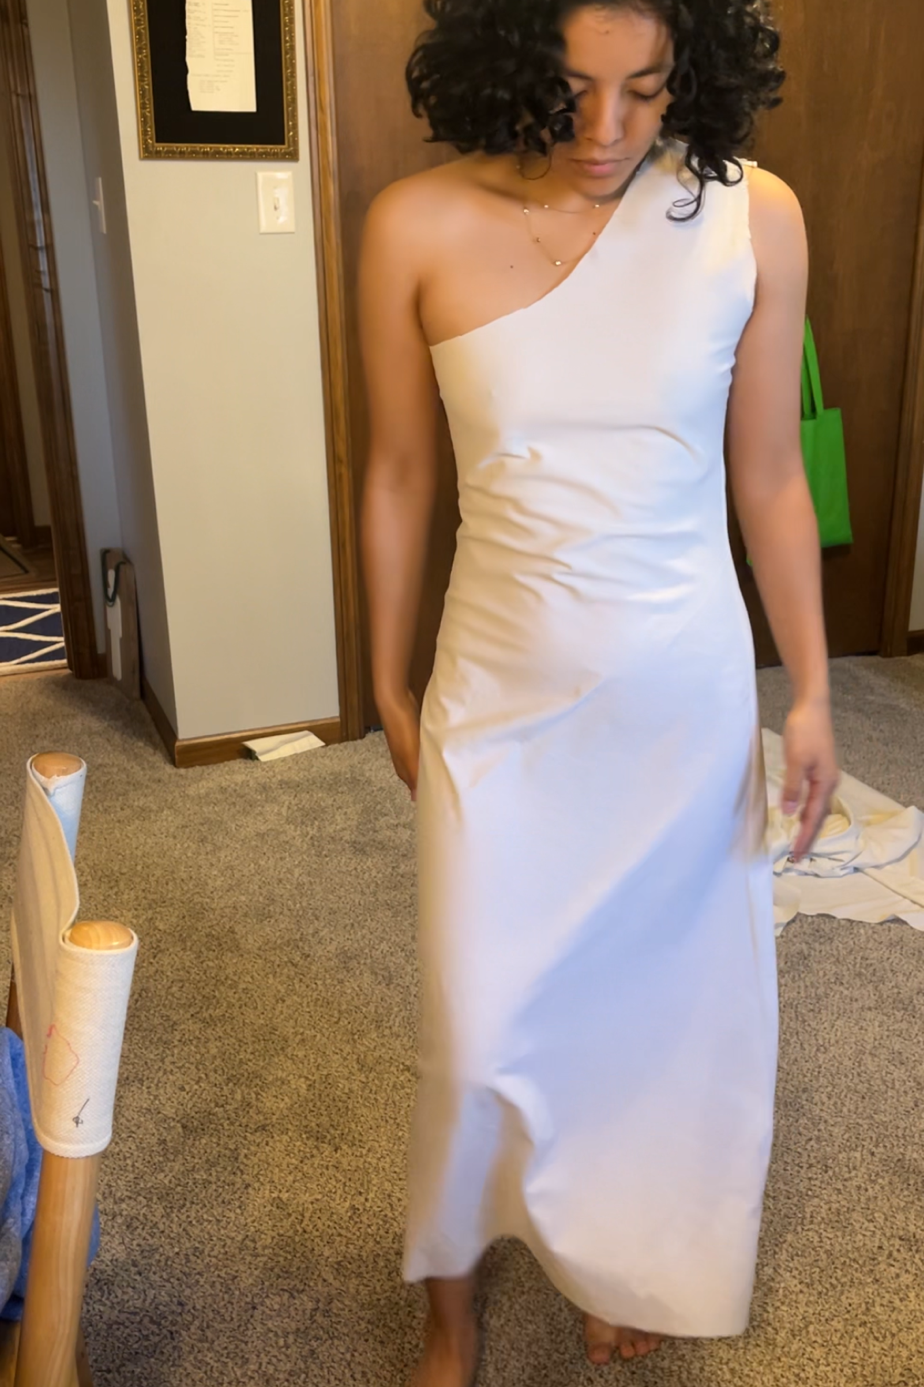
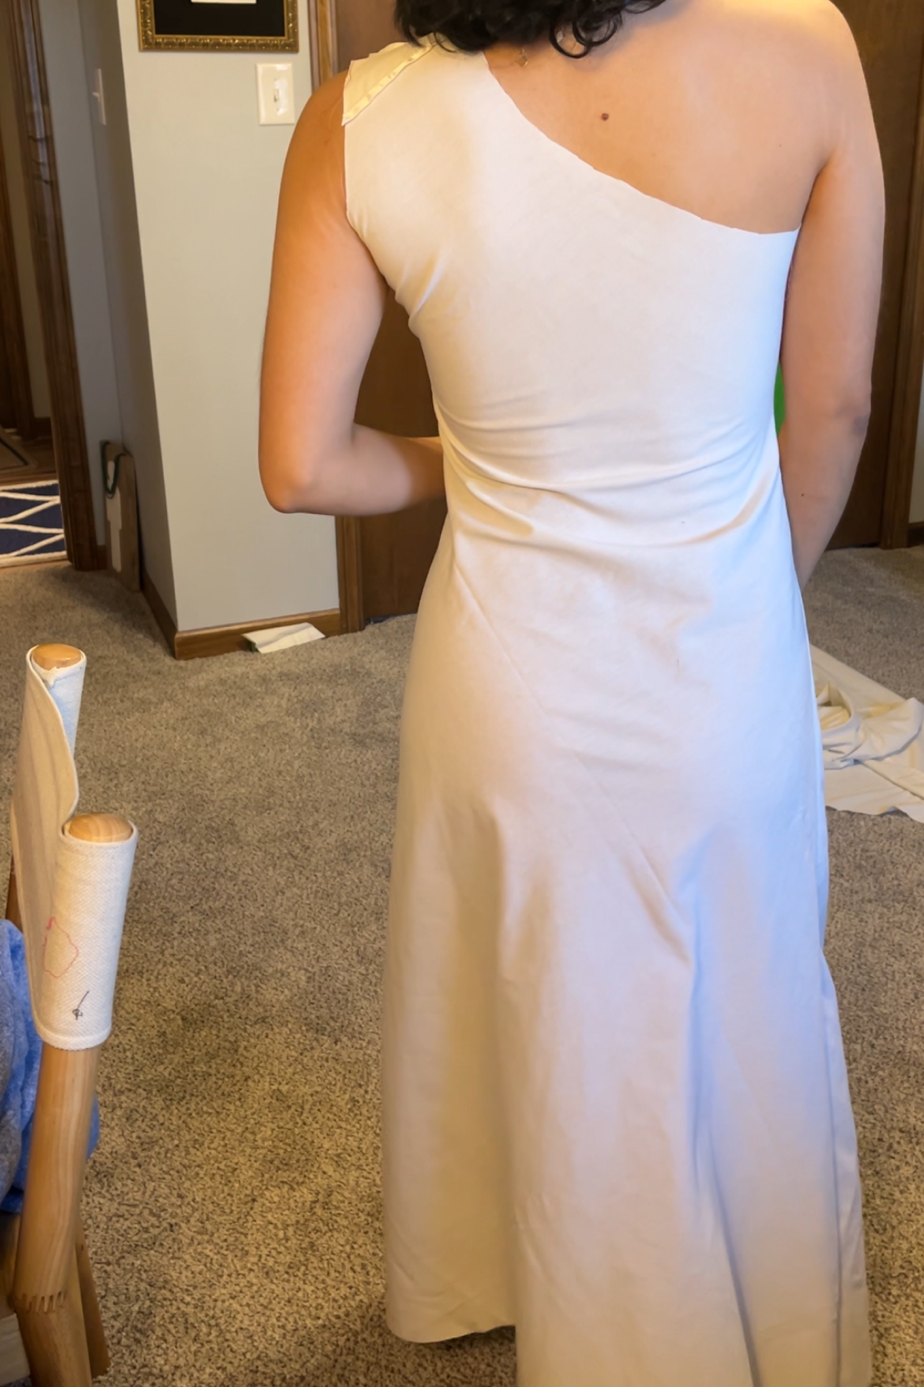
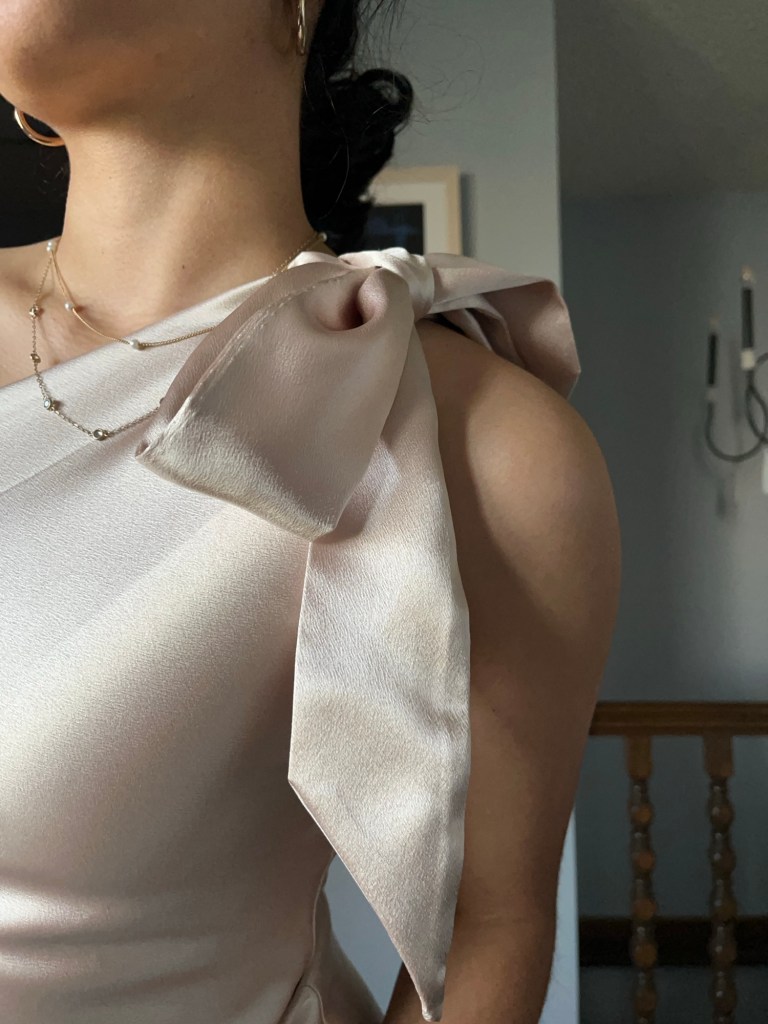
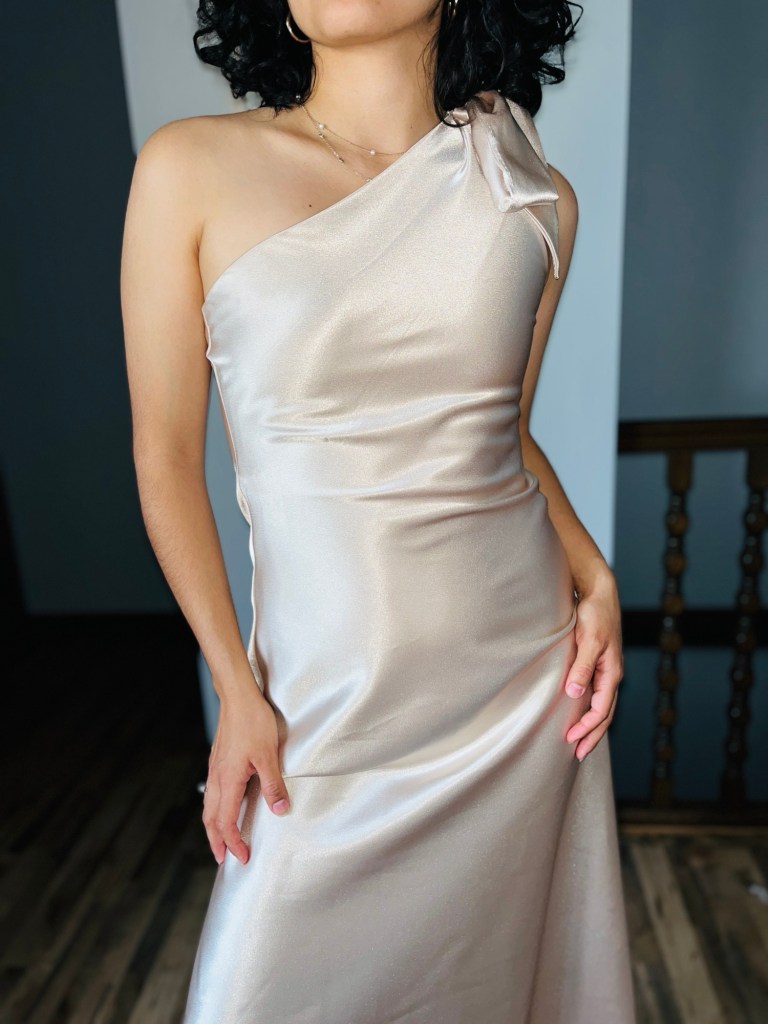
This tutorial features a bias cut dress with a bodice lining and a beautiful bow on the shoulder!
Over easter weekend, I decided to take on a wild challenge and sew a dress in 22 hours.
My husband and I had been invited to a church service followed by a dinner on Saturday and that friday afternoon I decided to make a dress to wear to the occasion. I wanted to make my life easier by using a pattern that I already had on hand, but unfortunately the patterns I had were way to big (which I was supposed to size down when bought). This meant I would need to make my own pattern, and made my way to Pinterest where I found this gem!
The dress looks to be cut on the bias, and reaches her mid-thigh. Since I would be wearing it to a church service, I opted for a mid-calf length.
To recreate the dress you will need:
- Bodice Sloper
- Measuring Tape
- Large Drawing Paper
- Pencil / Pen
- Curved & Straight Ruler
- Fabric Chalk / Pen
- 3-ish Yards of Fabric (Final & Tester Fabric Each)
To create the pattern, we begin with a self-drafted front/back sloper
Sloper
A basic pattern based on your personal measurements which is then used to create other patterns
To create my own sloper, I traced a fitted top on to paper and with trial and error made modifications to sewn muslins. You can also take a bodice from a bought pattern that already fits.

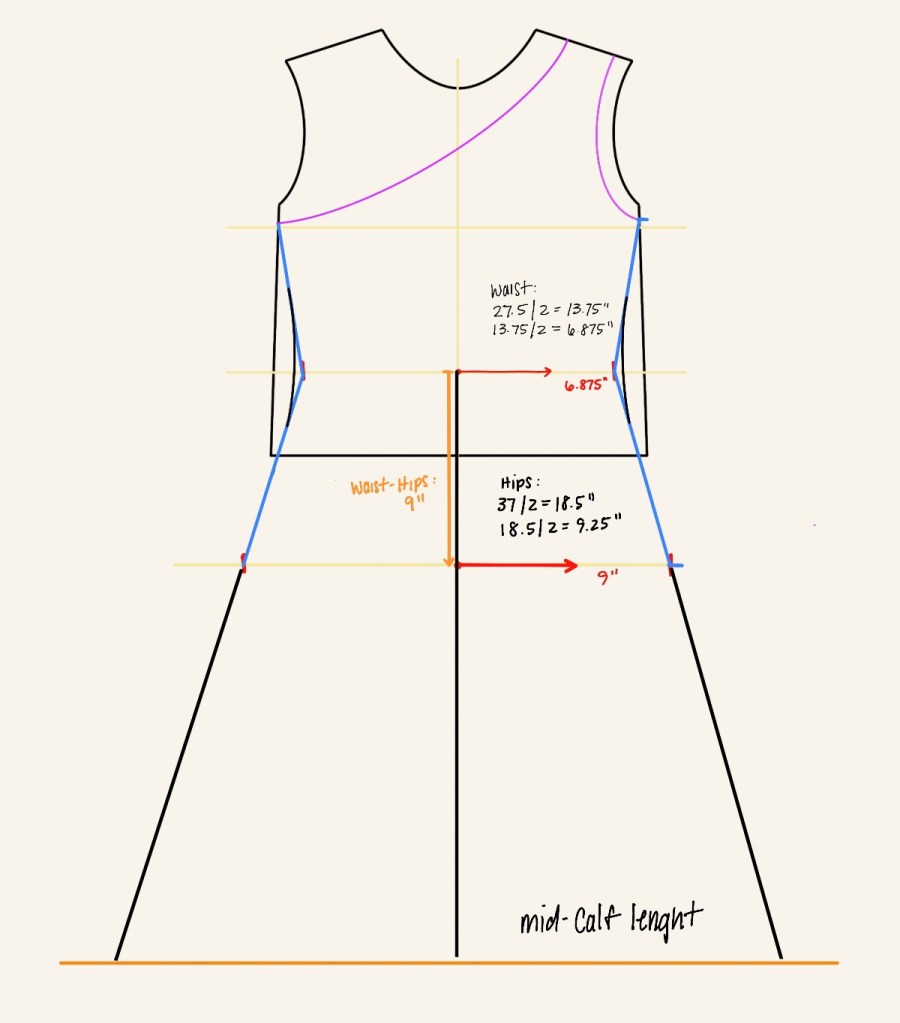
Once the bodice pattern has been chosen, if you only have half of the bodice drafted like I do, mirror it to get a full bodice pattern when tracing it. Make sure to draw the waist line, bust line and center. Identify which shoulder you want to “keep”, I chose left. Place the shoulder mark about 1-1.5 inches from the edge closest to your neck, and about 1 inch from the other edge.

At the armhole opening of both sides mark 1-1.5 inches down. Connect the inner shoulder line to the opposite side seam with a straight ruler, this line will become “Line A”. Where Line A and the centerline connect mark 2.5 – 3 inches down and label Point A. With your curved ruler connect the shoulder to point A, and with a straight ruler connect point A to the side seam; This method is to ensure there is enough boob coverage to avoid any accidents. Depending on how much boob you have, you will need more or less distance inbetween. Lastly connect the outside should mark to the armhole on the same side.
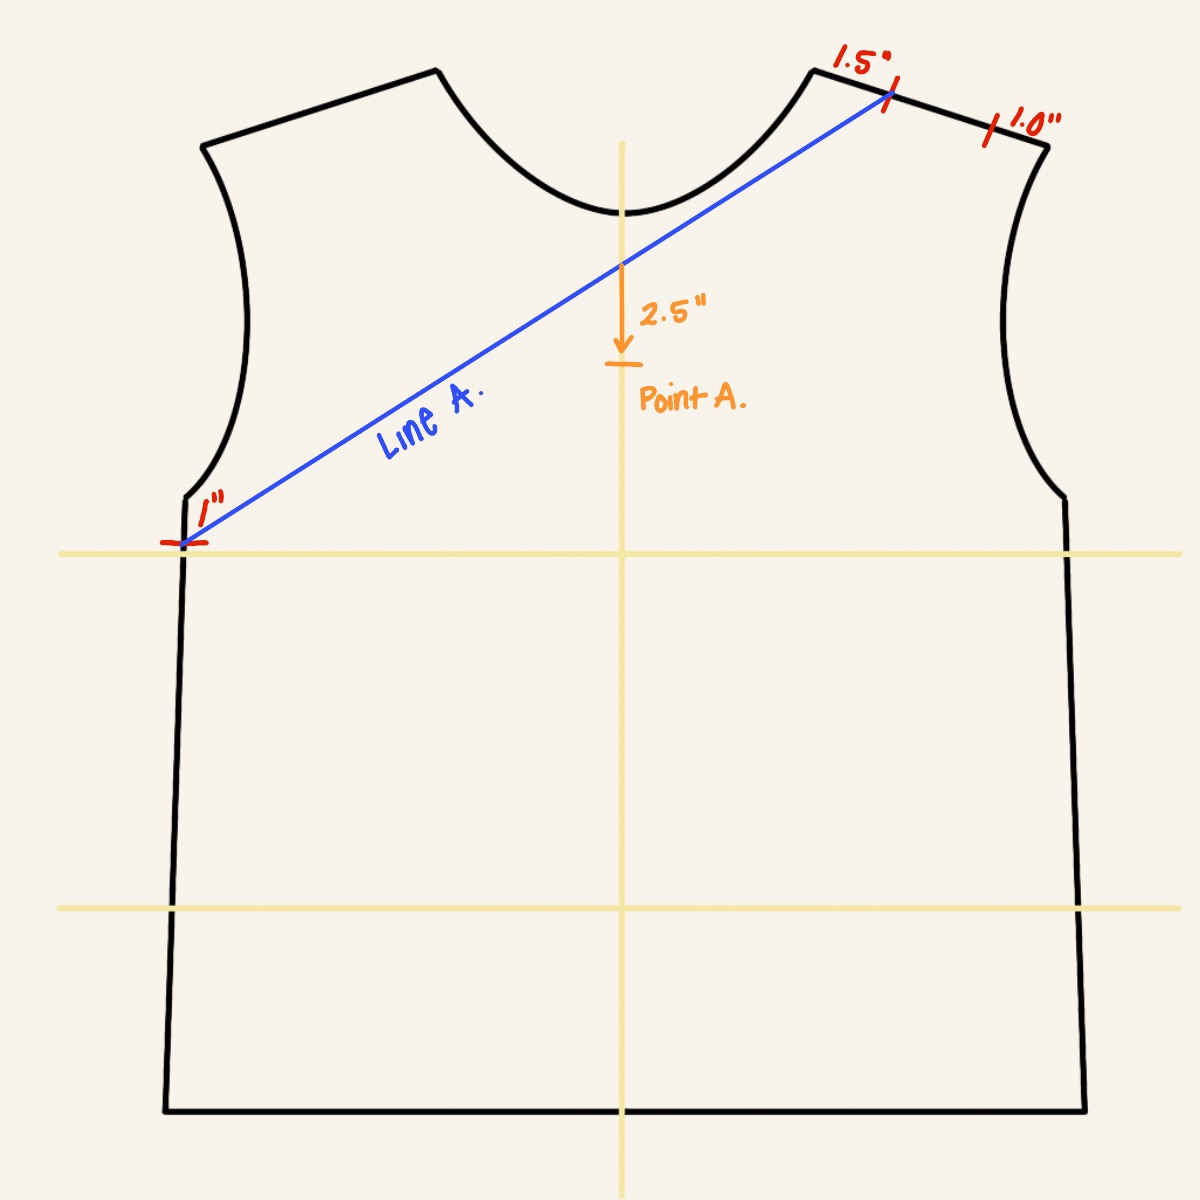

if you don’t have a curved ruler, or your ruler is too small like mine, you can just eyeball the curve.
Once you are satisfied with your curve, the hardest part is over.
Waist & Hip Measurement
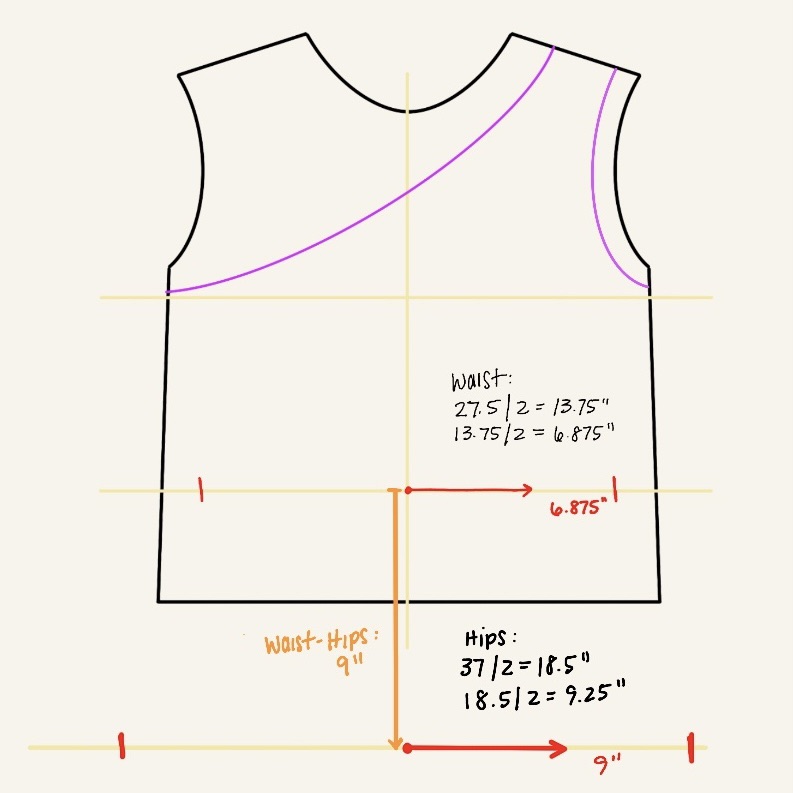
Take your measuring tape and measure around your waist. Then divide the measurement by 4. Go back to your pattern and on the centerline at your waist, measure and mark your divided waist measurement outward. Do this on both sides. If you want the dress to fit a little looser around your waist, you can add 1/4 -3/4 inches on each side – you will need to do this to the back pattern as well.
Take your measuring tape and measure around your hips and divide by 4. Again if you want more room around your hips add 1/4 – 3/4 inches to each side.
With your measuring tape, measure from your waist to your hips and mark that on the centerline of your pattern. Extend a long horizontal line at your hip measurement. From the center, measure and mark your hip measurement outward.
With a straight ruler connect the side seam to the waist and the waist to the hip mark. With your curved ruler curve out the waist, because no one has a inward pointed waist, and adjust the other lines as needed.
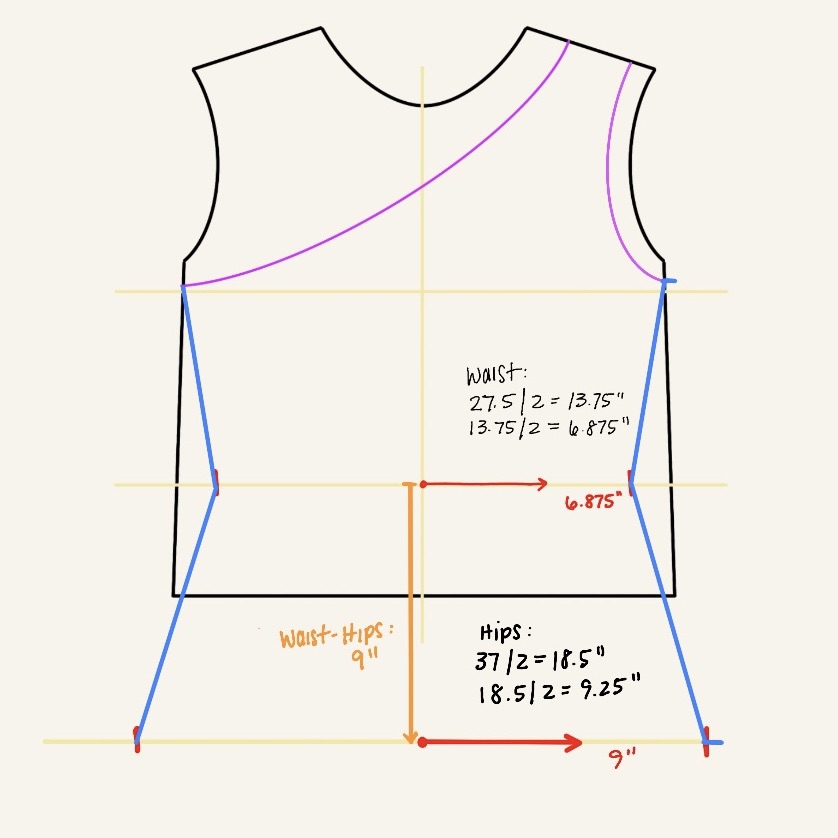
Last thing is determining how long to make the skirt of the dress. I opted for a mid-calf so I extend an extra 24 inches from my hips. Whatever length you are wanting, take your measuring tape and from your waist measure to the desired length. On your pattern place the measurement in the center of your waist, and mark downward.
Once you place your mark, draw a line horizontal across your paper and extend your side seams till they touch the line.
finally add a seam allowance – i added 1/4 inch all around my pattern but you can go up to 1 inch incase you decide to change the fittedness of the dress.
Follow these steps for the back bodice, making sure to line up the armhole openings to the front bodice to ensure everything will alight in the end.

I opted to sew a muslin to try out my pattern and this allowed me to make some changes to the pattern before using my final fabric. This pattern needs to be cut on the bias, 45 degrees so it allows for maximum stretch and drape.
When cutting my pattern pieces I decided to cut a lining for the chest, to prevent any issues since the inside of the fabric is rough. I took the same pattern pieces and the same fabric and cut right at the waistline.
The other pattern piece you need is the bow, which is a simple rectangle. I made my ribbon 5 inches wide by 50 inches long with a 1/4 inch seam allowance.
it’s time to assemble.
Make sure to Iron the garment after each step
You will take the front and back of the dress right sides together and sew at the shoulder. Repeat this for the lining, and iron the seams open.
Place the lining on top of the dress right-sides together. Pin the pieces together at the shoulder, side seams and along the curves to ensure everything stays in place.
sew the armhole curve and the neckline closed and iron the seams toward the lining. Do not sew the side seams closed.
To turn it right-side out, insert your hand in between the dress and lining, and pull the other half of the garment through the shoulder space.
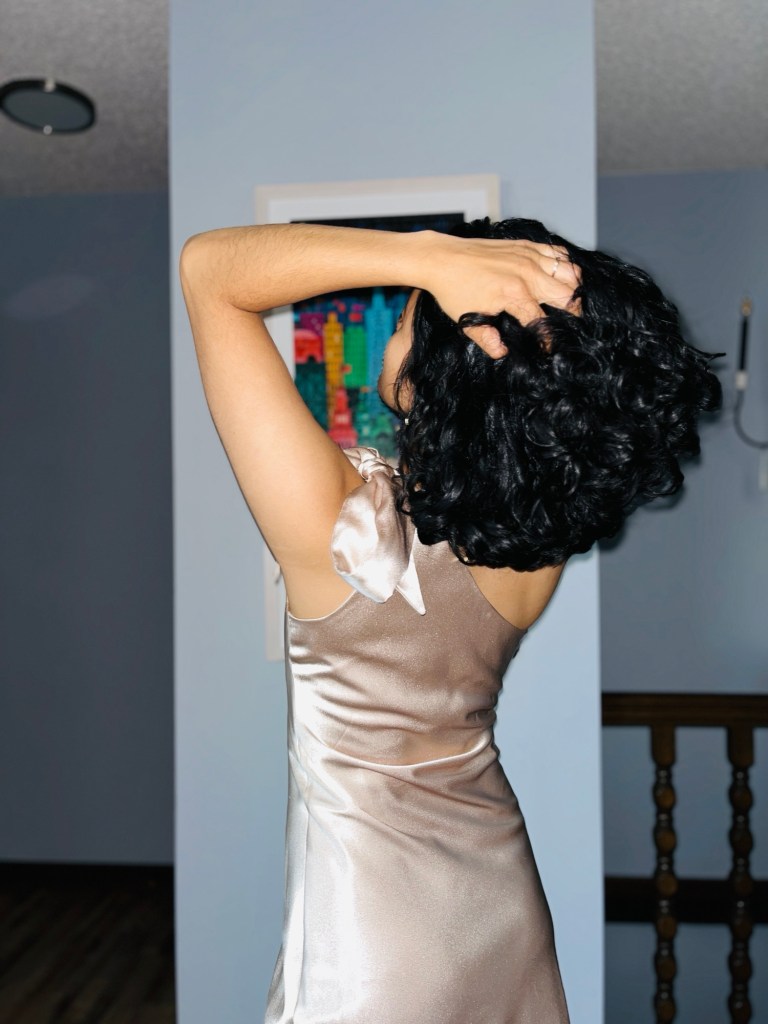
Spread the dress out, and pull the lining away from the dress. Join the front and back lining together and pin at the armhole and more along the seams if needed. Sew the seams closed from the top of the lining, all the way to the bottom of the dress, making sure that the armholes match. iron the seam towards the back.
You can insert a side zipper for easy in and out access but I found that I was able to put it on without. This of course depends on your measurements and ability to slip on a fitted garment.
To prevent the lining from riding up or moving I hand stitched the lining to the dresses seams at the top of the neckline and at the bottom of both sides.
Sewing the Ribbon / Bow
fold the rectangle in half, right-side touching and sew along the long seam. Iron the seam to one side. With your rectangular ruler, draw a 45 degree angle from one corner to the opposite side and sew it closed on one end. For the other end, draw the same line but leave about 1 inch of an opening in the middle to turn it out. Based on the image, the ribbon seems to have a curved edge, so if you want that style, simple use your curved ruler or eyeball a curve.
Turn the ribbon right-side out and iron. Then hand-stitch your opening closed with a ladder stitch or a simple whip stitch.
If you are able to – let your dress hang for 24-48 hours to allow how the hem to fully stretch and then level it out and hem it.
Hem the skirt by placing a simple stitch line all around the skirt without a fold and then using that stitch as a guideline and folding upwards to get an even hem.
Since the dress is cut on a 45 degree angle, you don’t have to worry about finishing the seams with a zig zag stitch or serger since the unfinished seams will not fray.
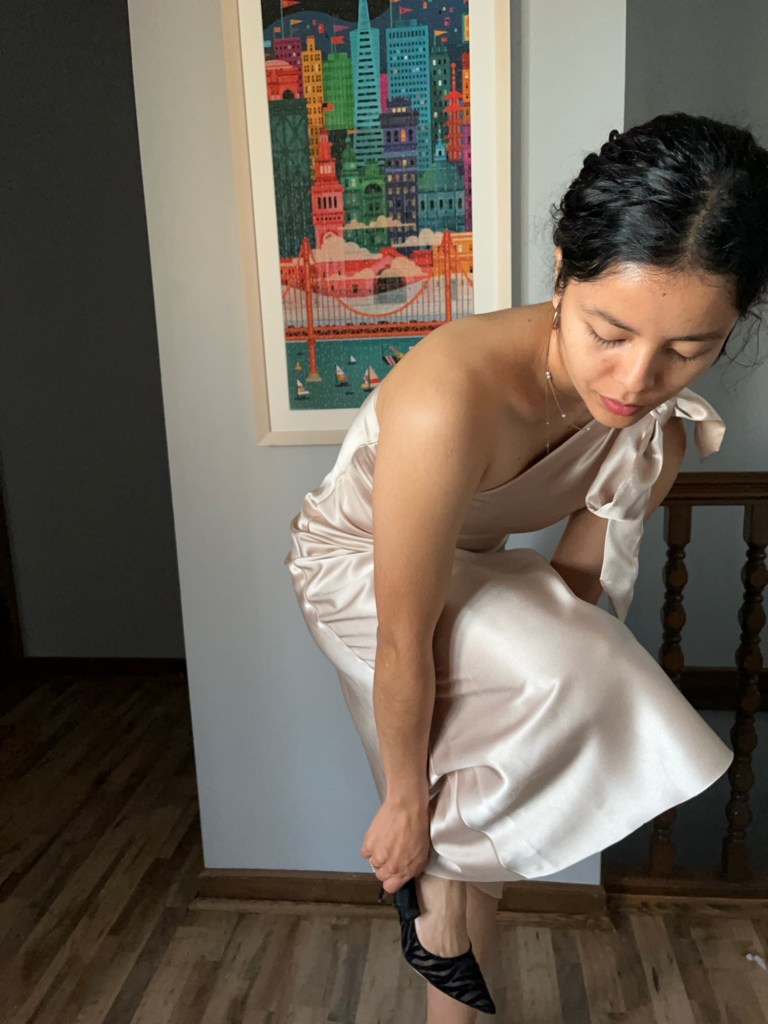
Final Results
The dress is a 5/5 pickles and I could not be happier with the result.


Leave a comment