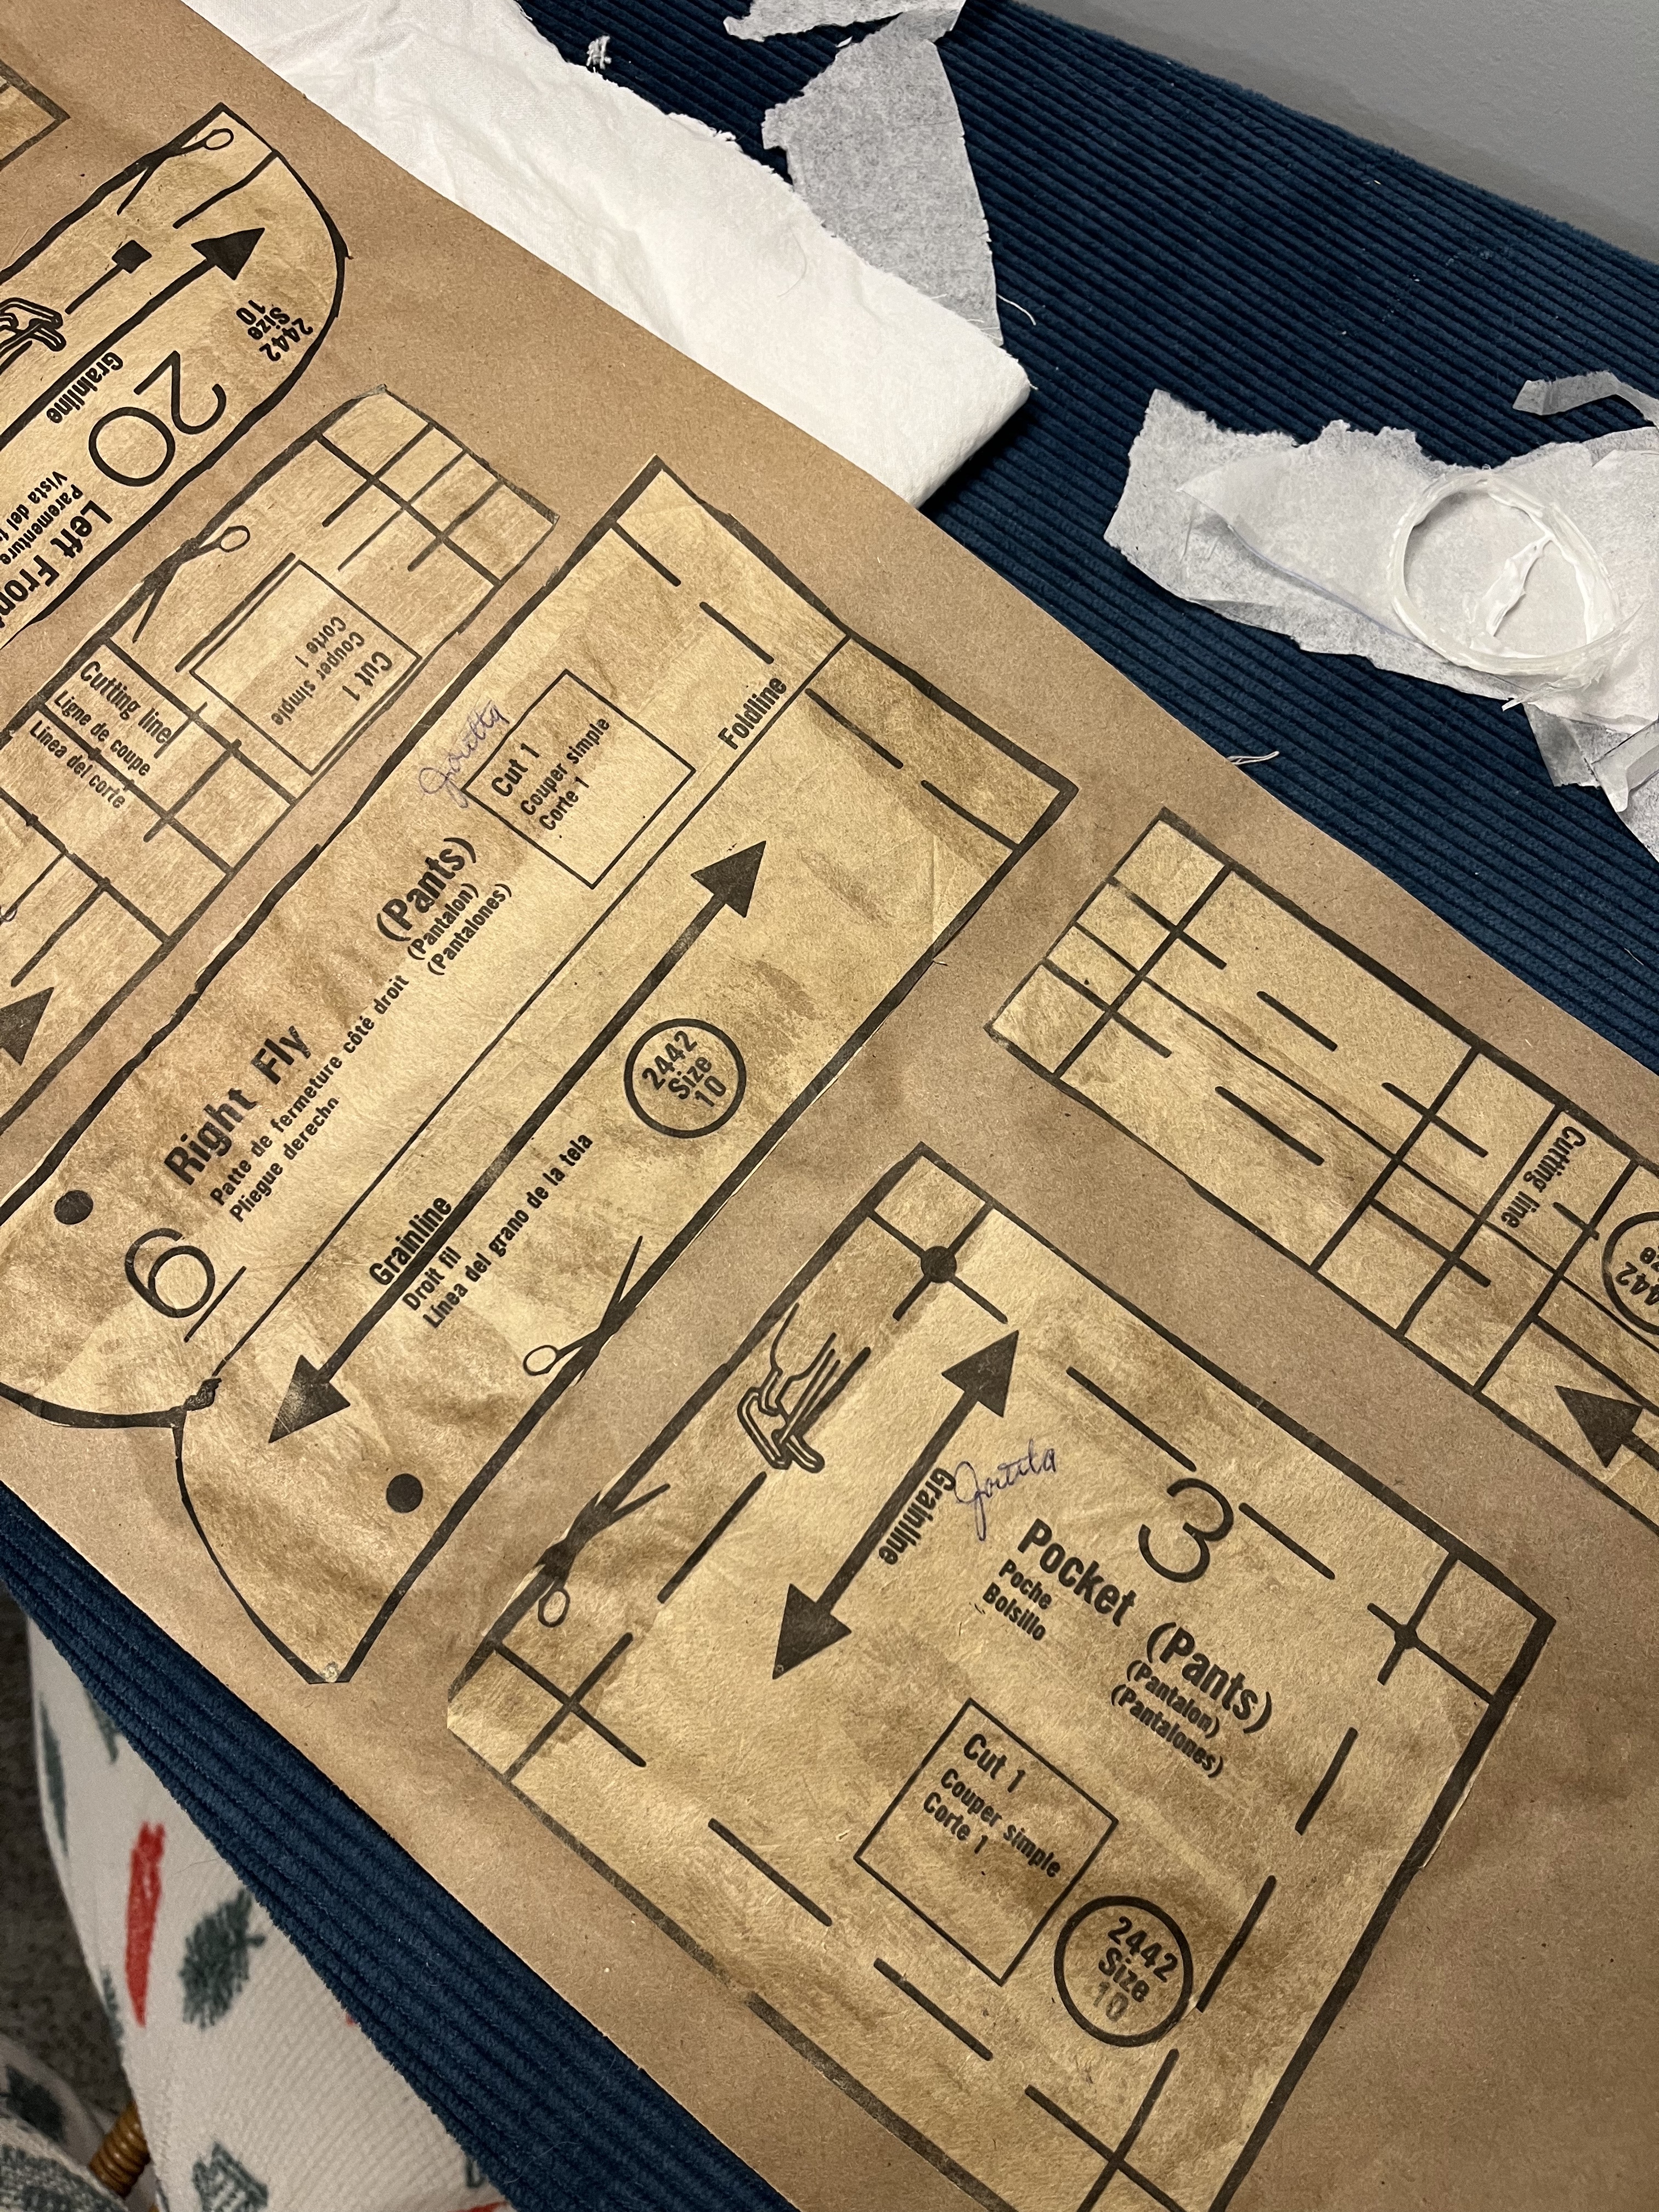
I’M DOING THE THING! I have been dreaming of making my own jeans, but was always a bit too intimidated because of all the things I “needed” in order to make a worthy pair of jeans…my biggest issues with jeans have always been the fit , which i’m sure comes as no surprise to anyone. I have been struggling with finding the right pair of jeans, ones that would be snug around my waist, would make my butt pop (since I don’t have much in that department), one to fit my exact length and one where the crotch depth was comfortable enough when sitting for long periods of time. In today’s prices, this sounds like a lot to ask for as little as i’m willing to pay, so when I found the Vogue American Designer 2442 pattern for $.25 at my thrift store I knew there was no way I could pass the opportunity off.
My intentions for this project are to create a good quality pair of jeans that fit in all of the right places, and are comfortable to sit in for long periods of time. I want to use this project as a chance to fall back in love with the process of sewing. For a while I have been pushing through the steps, just so I can get to the finished product and when I get there I find all of the baby mistakes I could have avoided if I would have just taken some extra time and attention; therefore I will slow down my practice and begin by making a twill (sample) and working through the instructions and the fit issues… here I go!
Day 1 (1/31): Prep Work
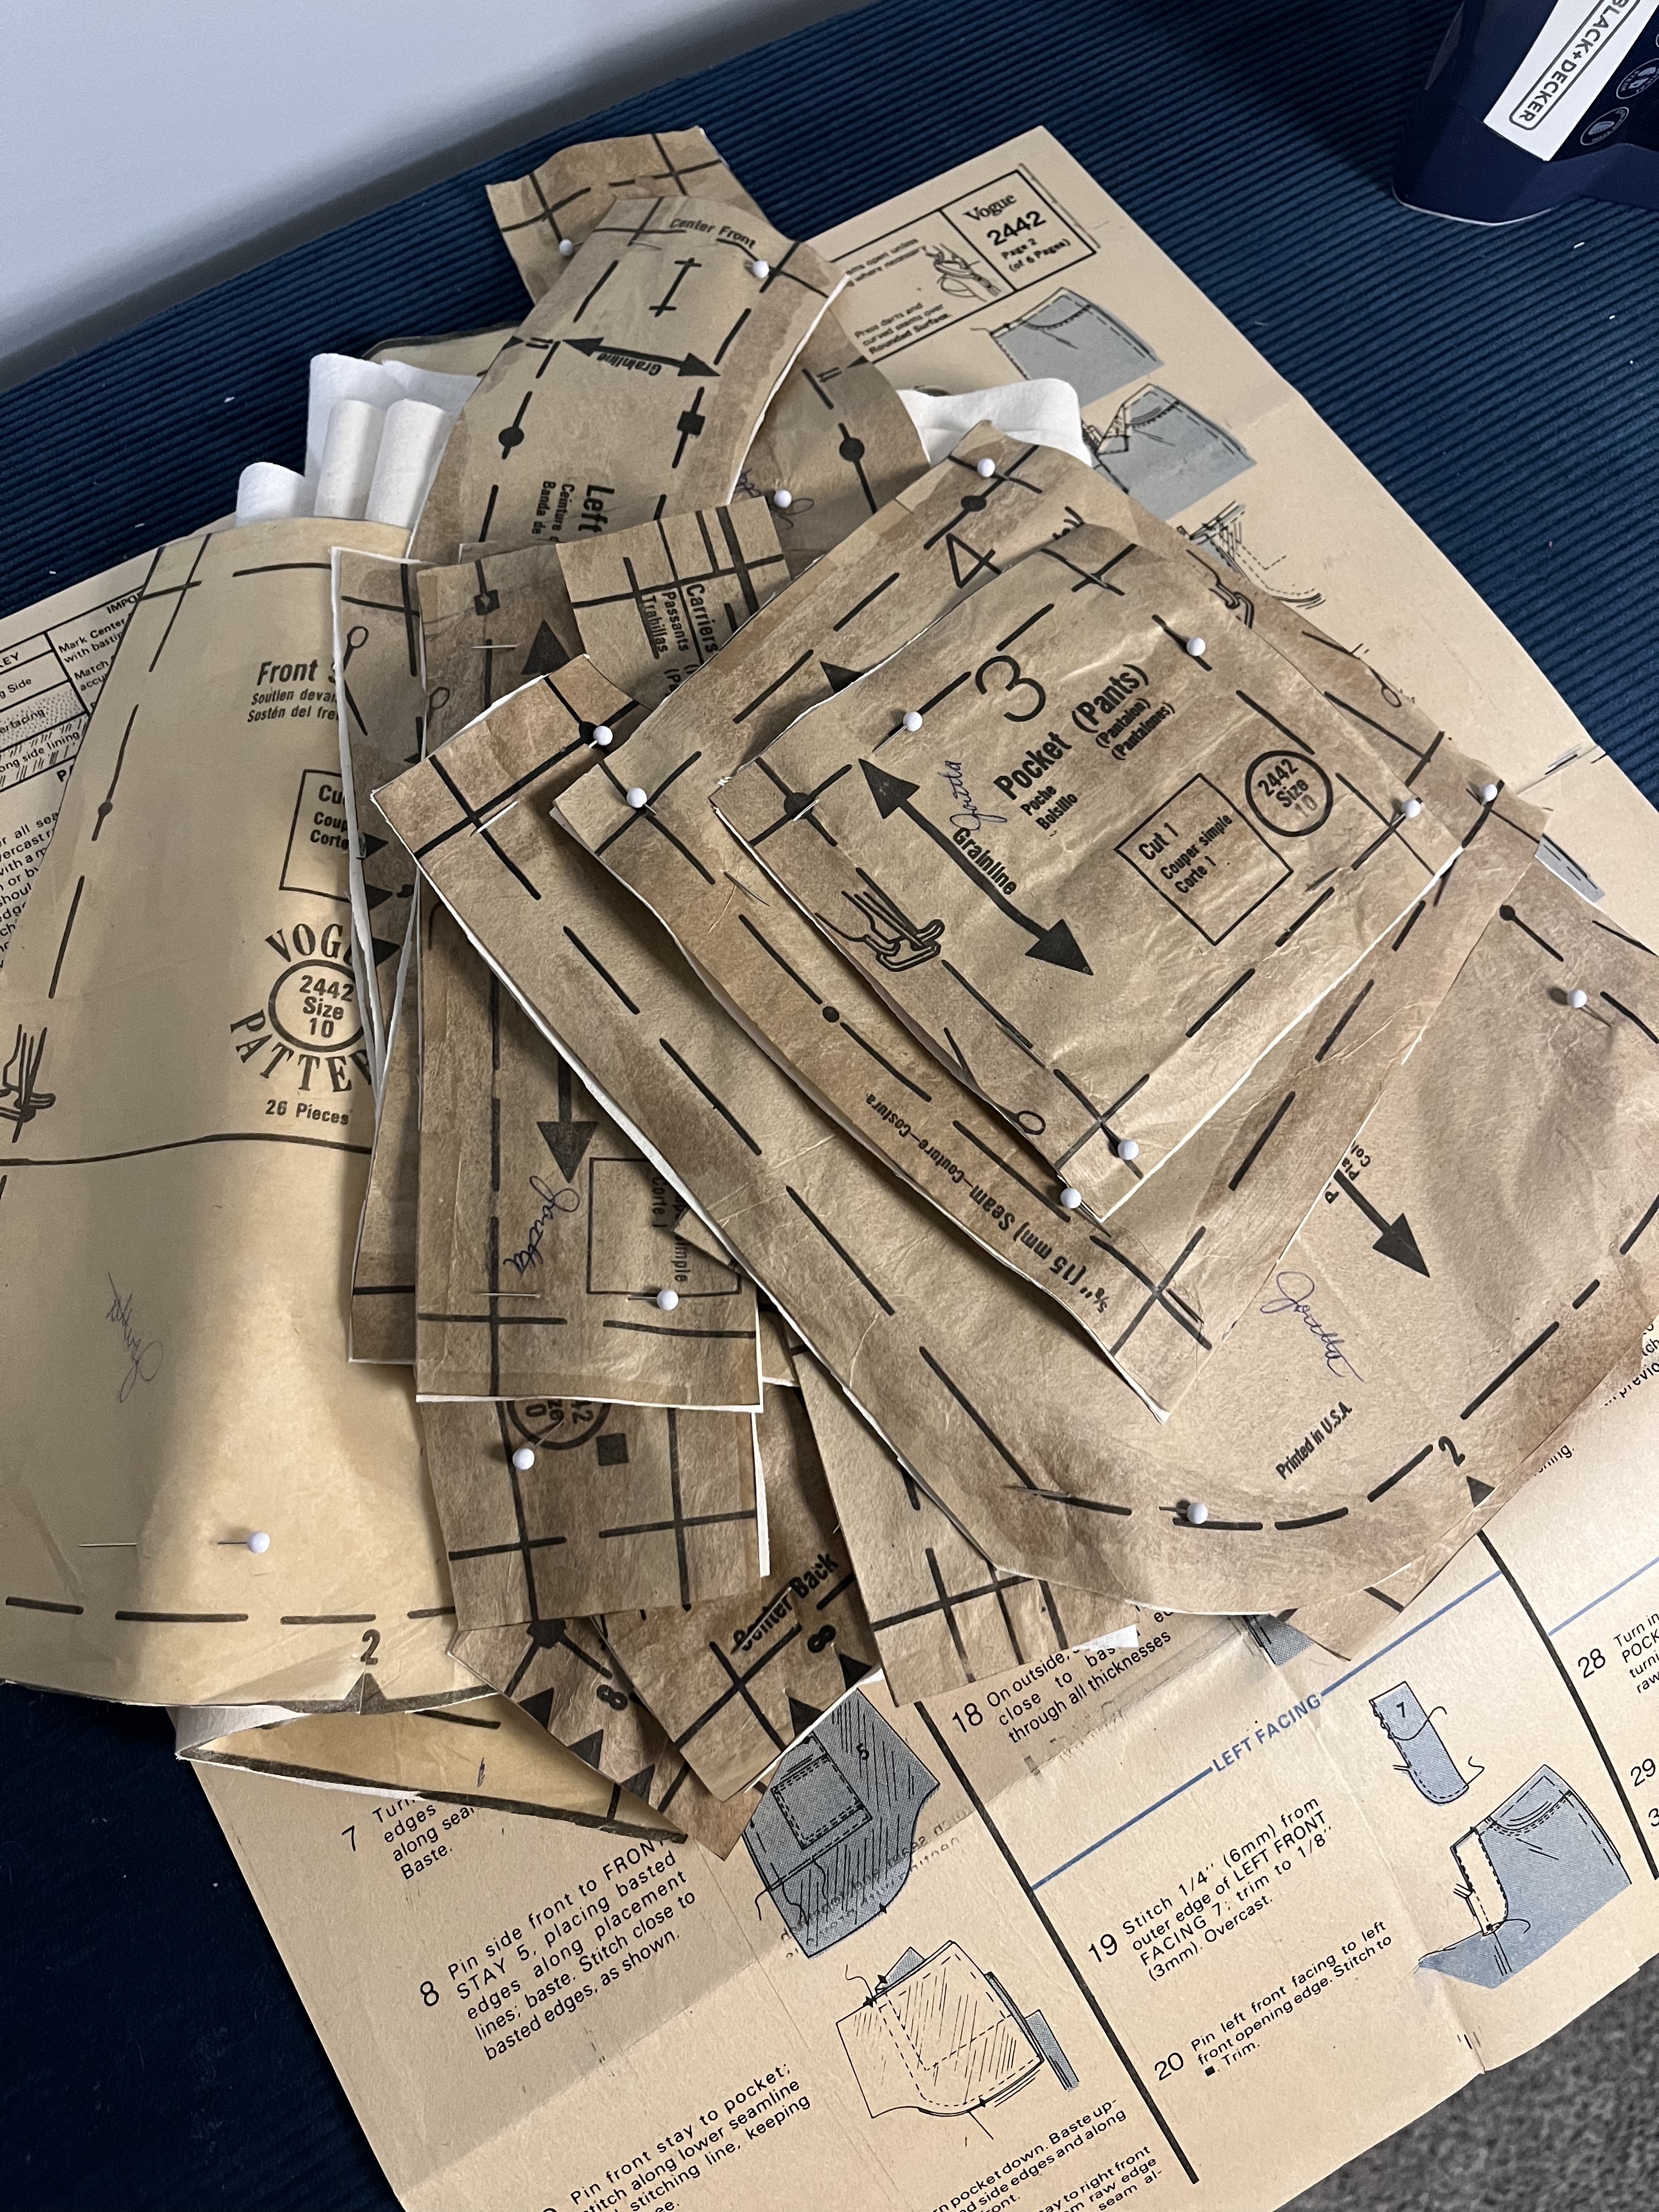
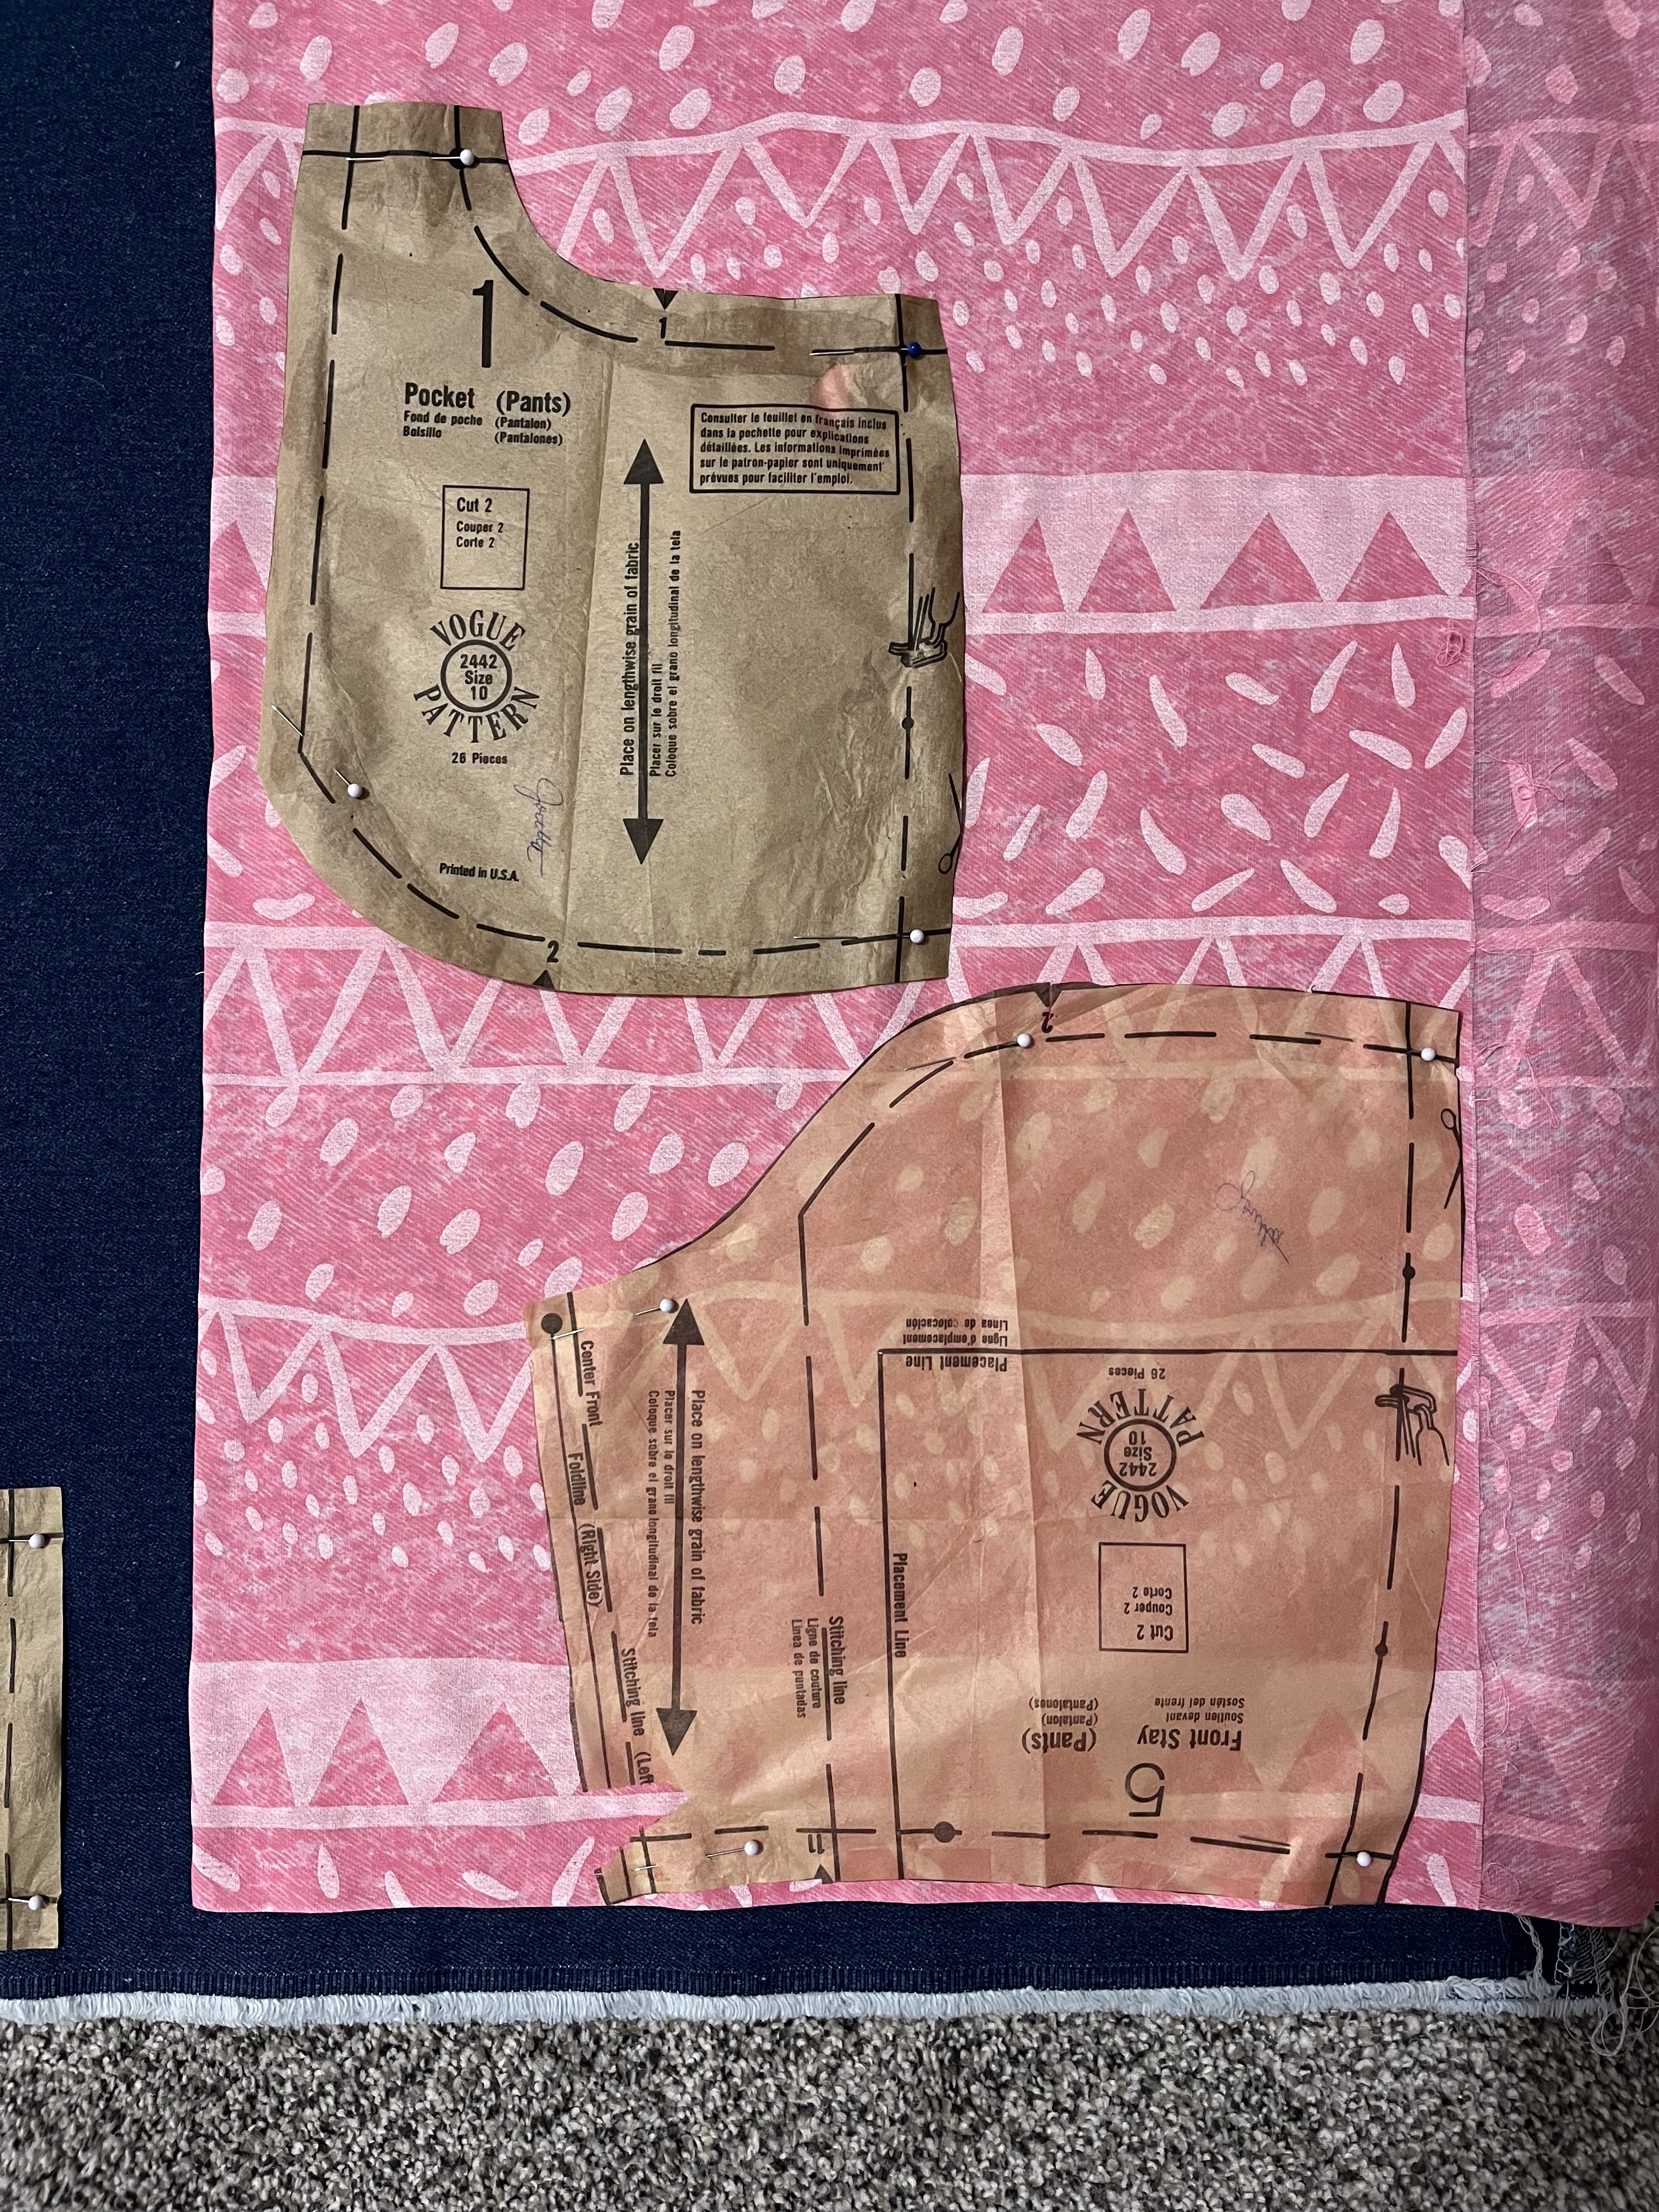
It is wednesday and I am beginning by sorting my pattern. This pattern comes with 2 versions (jeans and skirt) and from a note I found on the pattern it looks to be from the 80’s, so not all pieces might be here. As i’m sorting my pieces I notice that some are taped and have extra paper on the back. The paper feels extra fragile, so i’m going to re-enforce them by gluing them down to another piece of paper. With some modge podge and a brush, i’ll glue down the edges and maybe some of the middle and let them all dry. Once the glue had dried, I began cutting them out, ironing to ensure they all lay flat and then cutting them in my twill fabric.
Day 2 (2/01): Fabric Cutting
I didn’t have enough muslin fabric to cut out all of the pattern pieces and debated shortening the legs to save on some fabric but I really wanted to see how long the pattern is and how much I would need to shorten the final product, to fit my vision; therefore I decided to use scraps of a duvet cover that I had left over. This gave me the rest of the fabric needed, so I began cutting all of my pattern pieces out.
Day 3 (2/02): Twill Time
I have spent my afternoon with my husband running endless amounts of errands but now I get to spend my night sewing my twill. My intencion for this trial run is to learn all of the steps and go through all of the confusing instructions that come from old patterns.
Day 4 (2/03): Twill Time x2
I got through majority of the pants last night but was way too tired by 10:30-ish and decided to call it a night. My biggest hurdle from the pattern instructions has been the zipper. It took a lot of re-reading and questioning to get through and I don’t think it came out correctly but it zips so maybe…? (spoiler it was not correct)
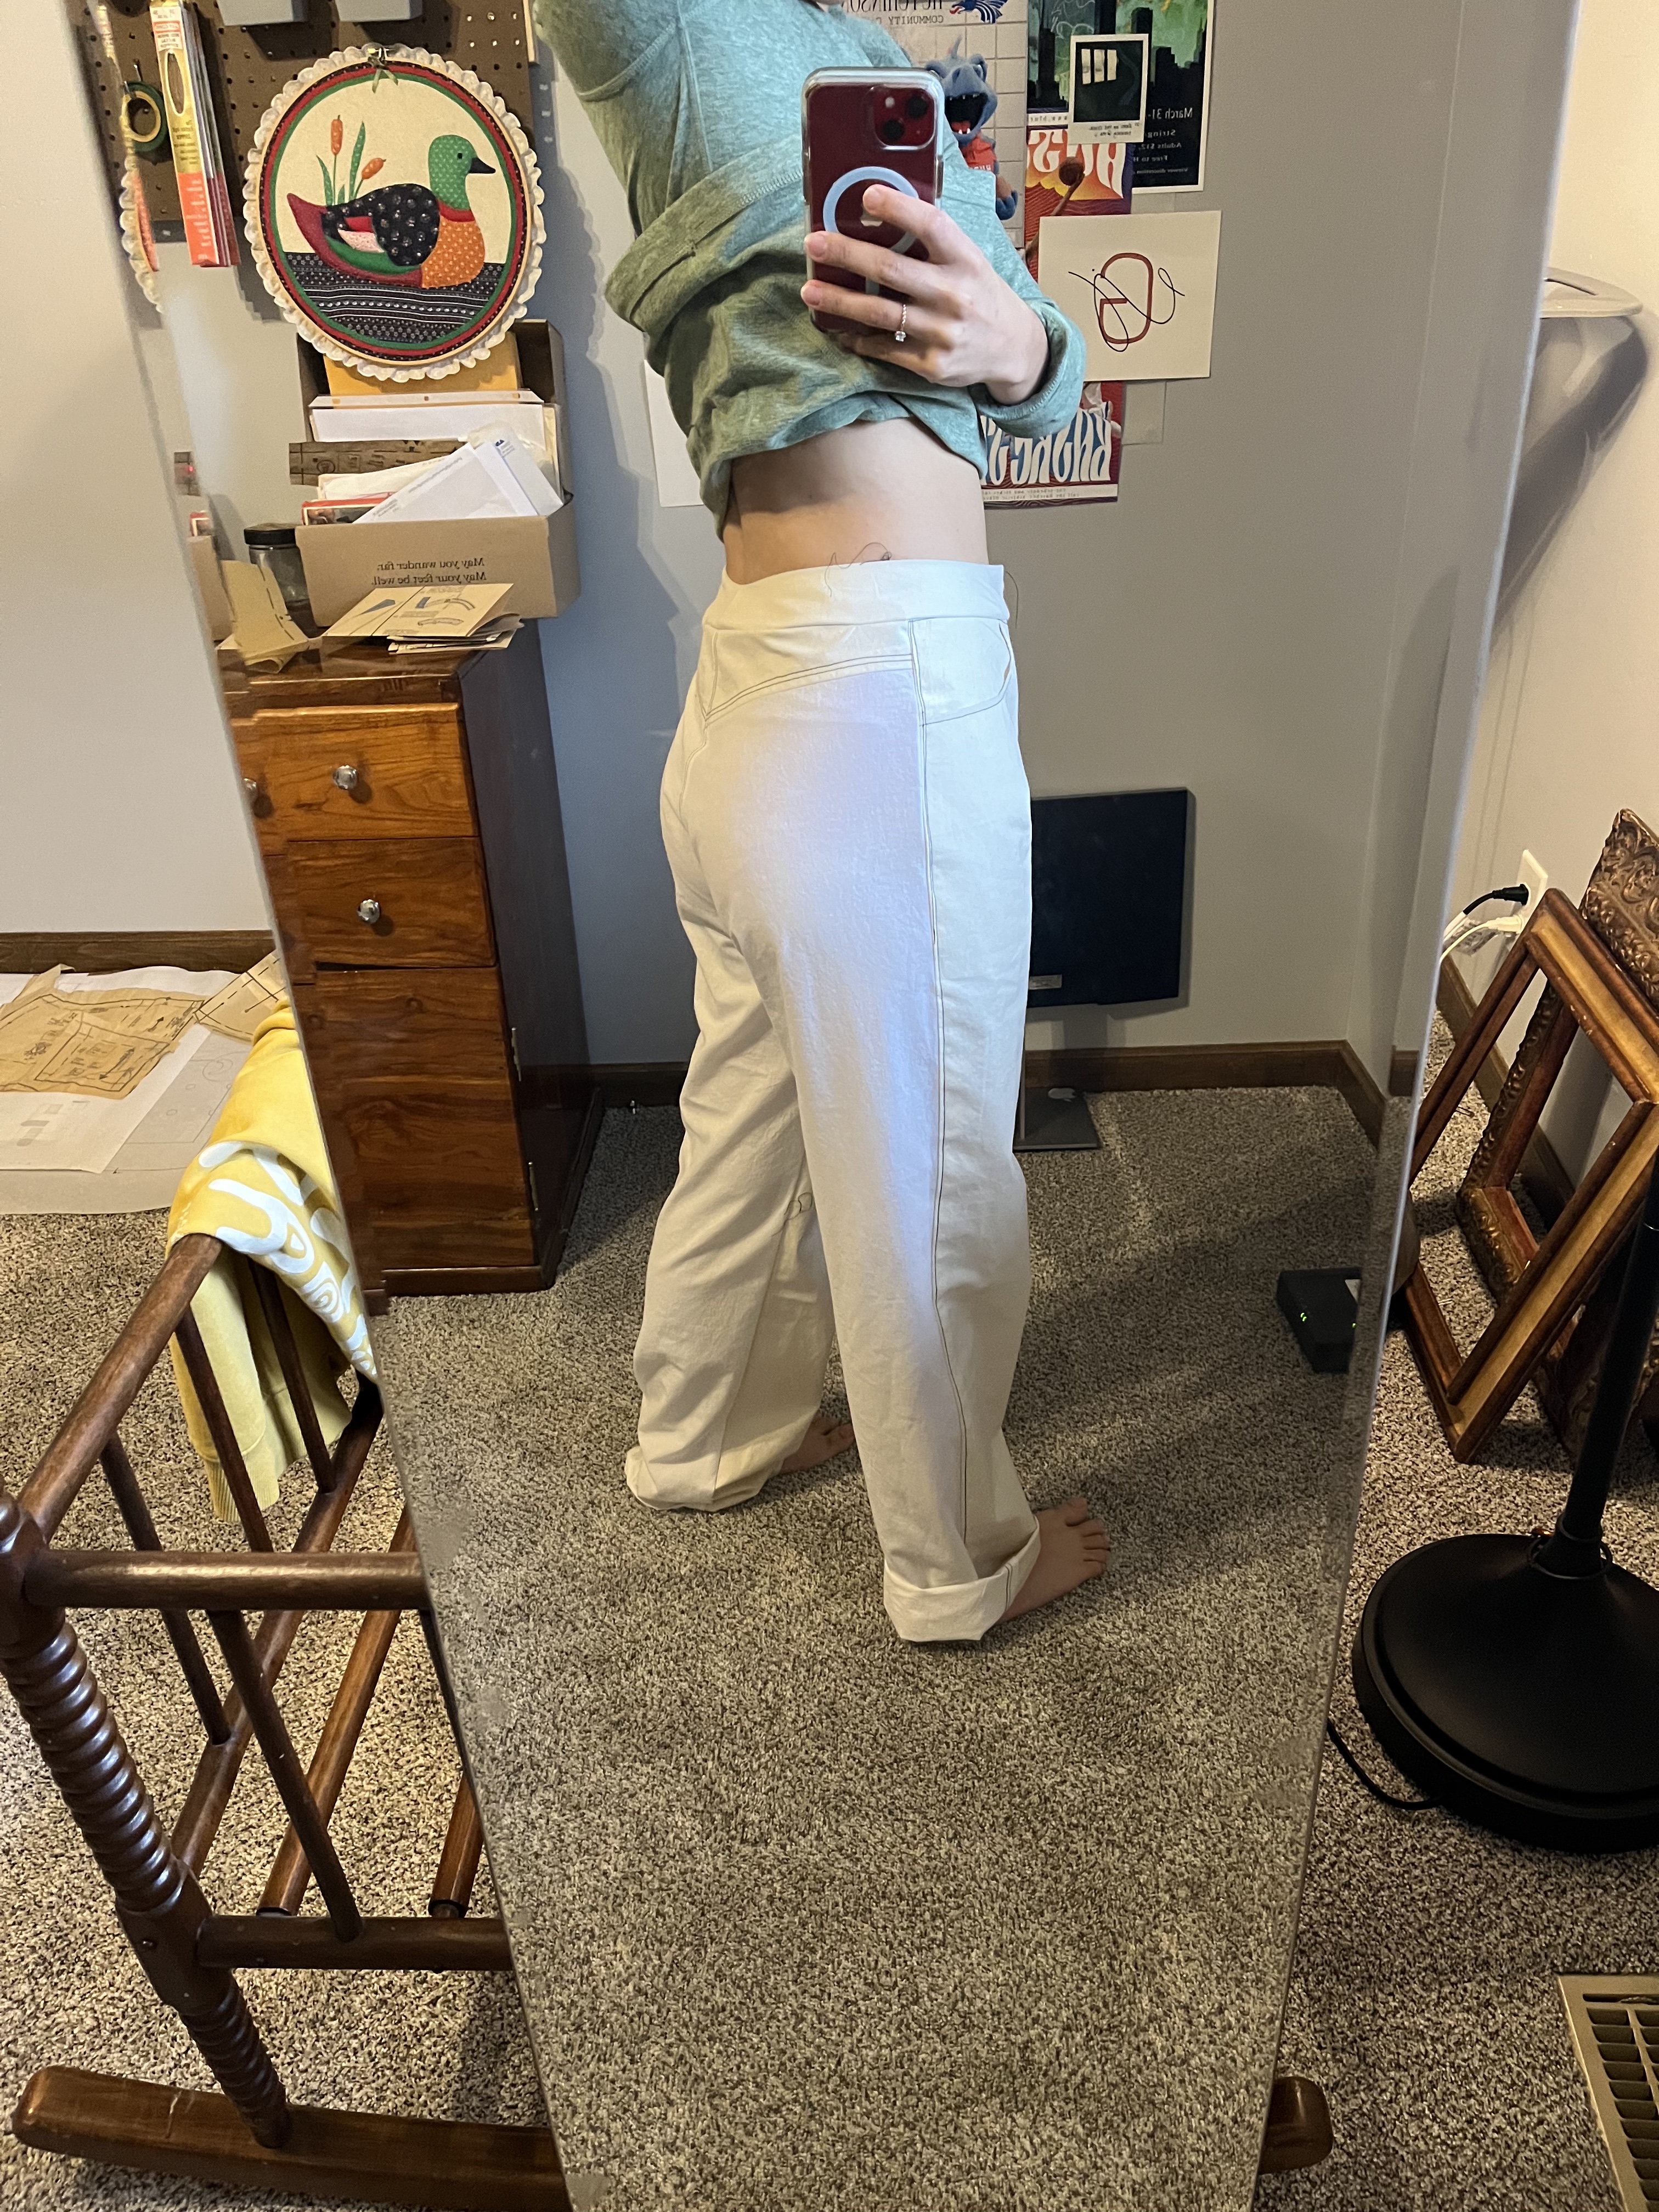
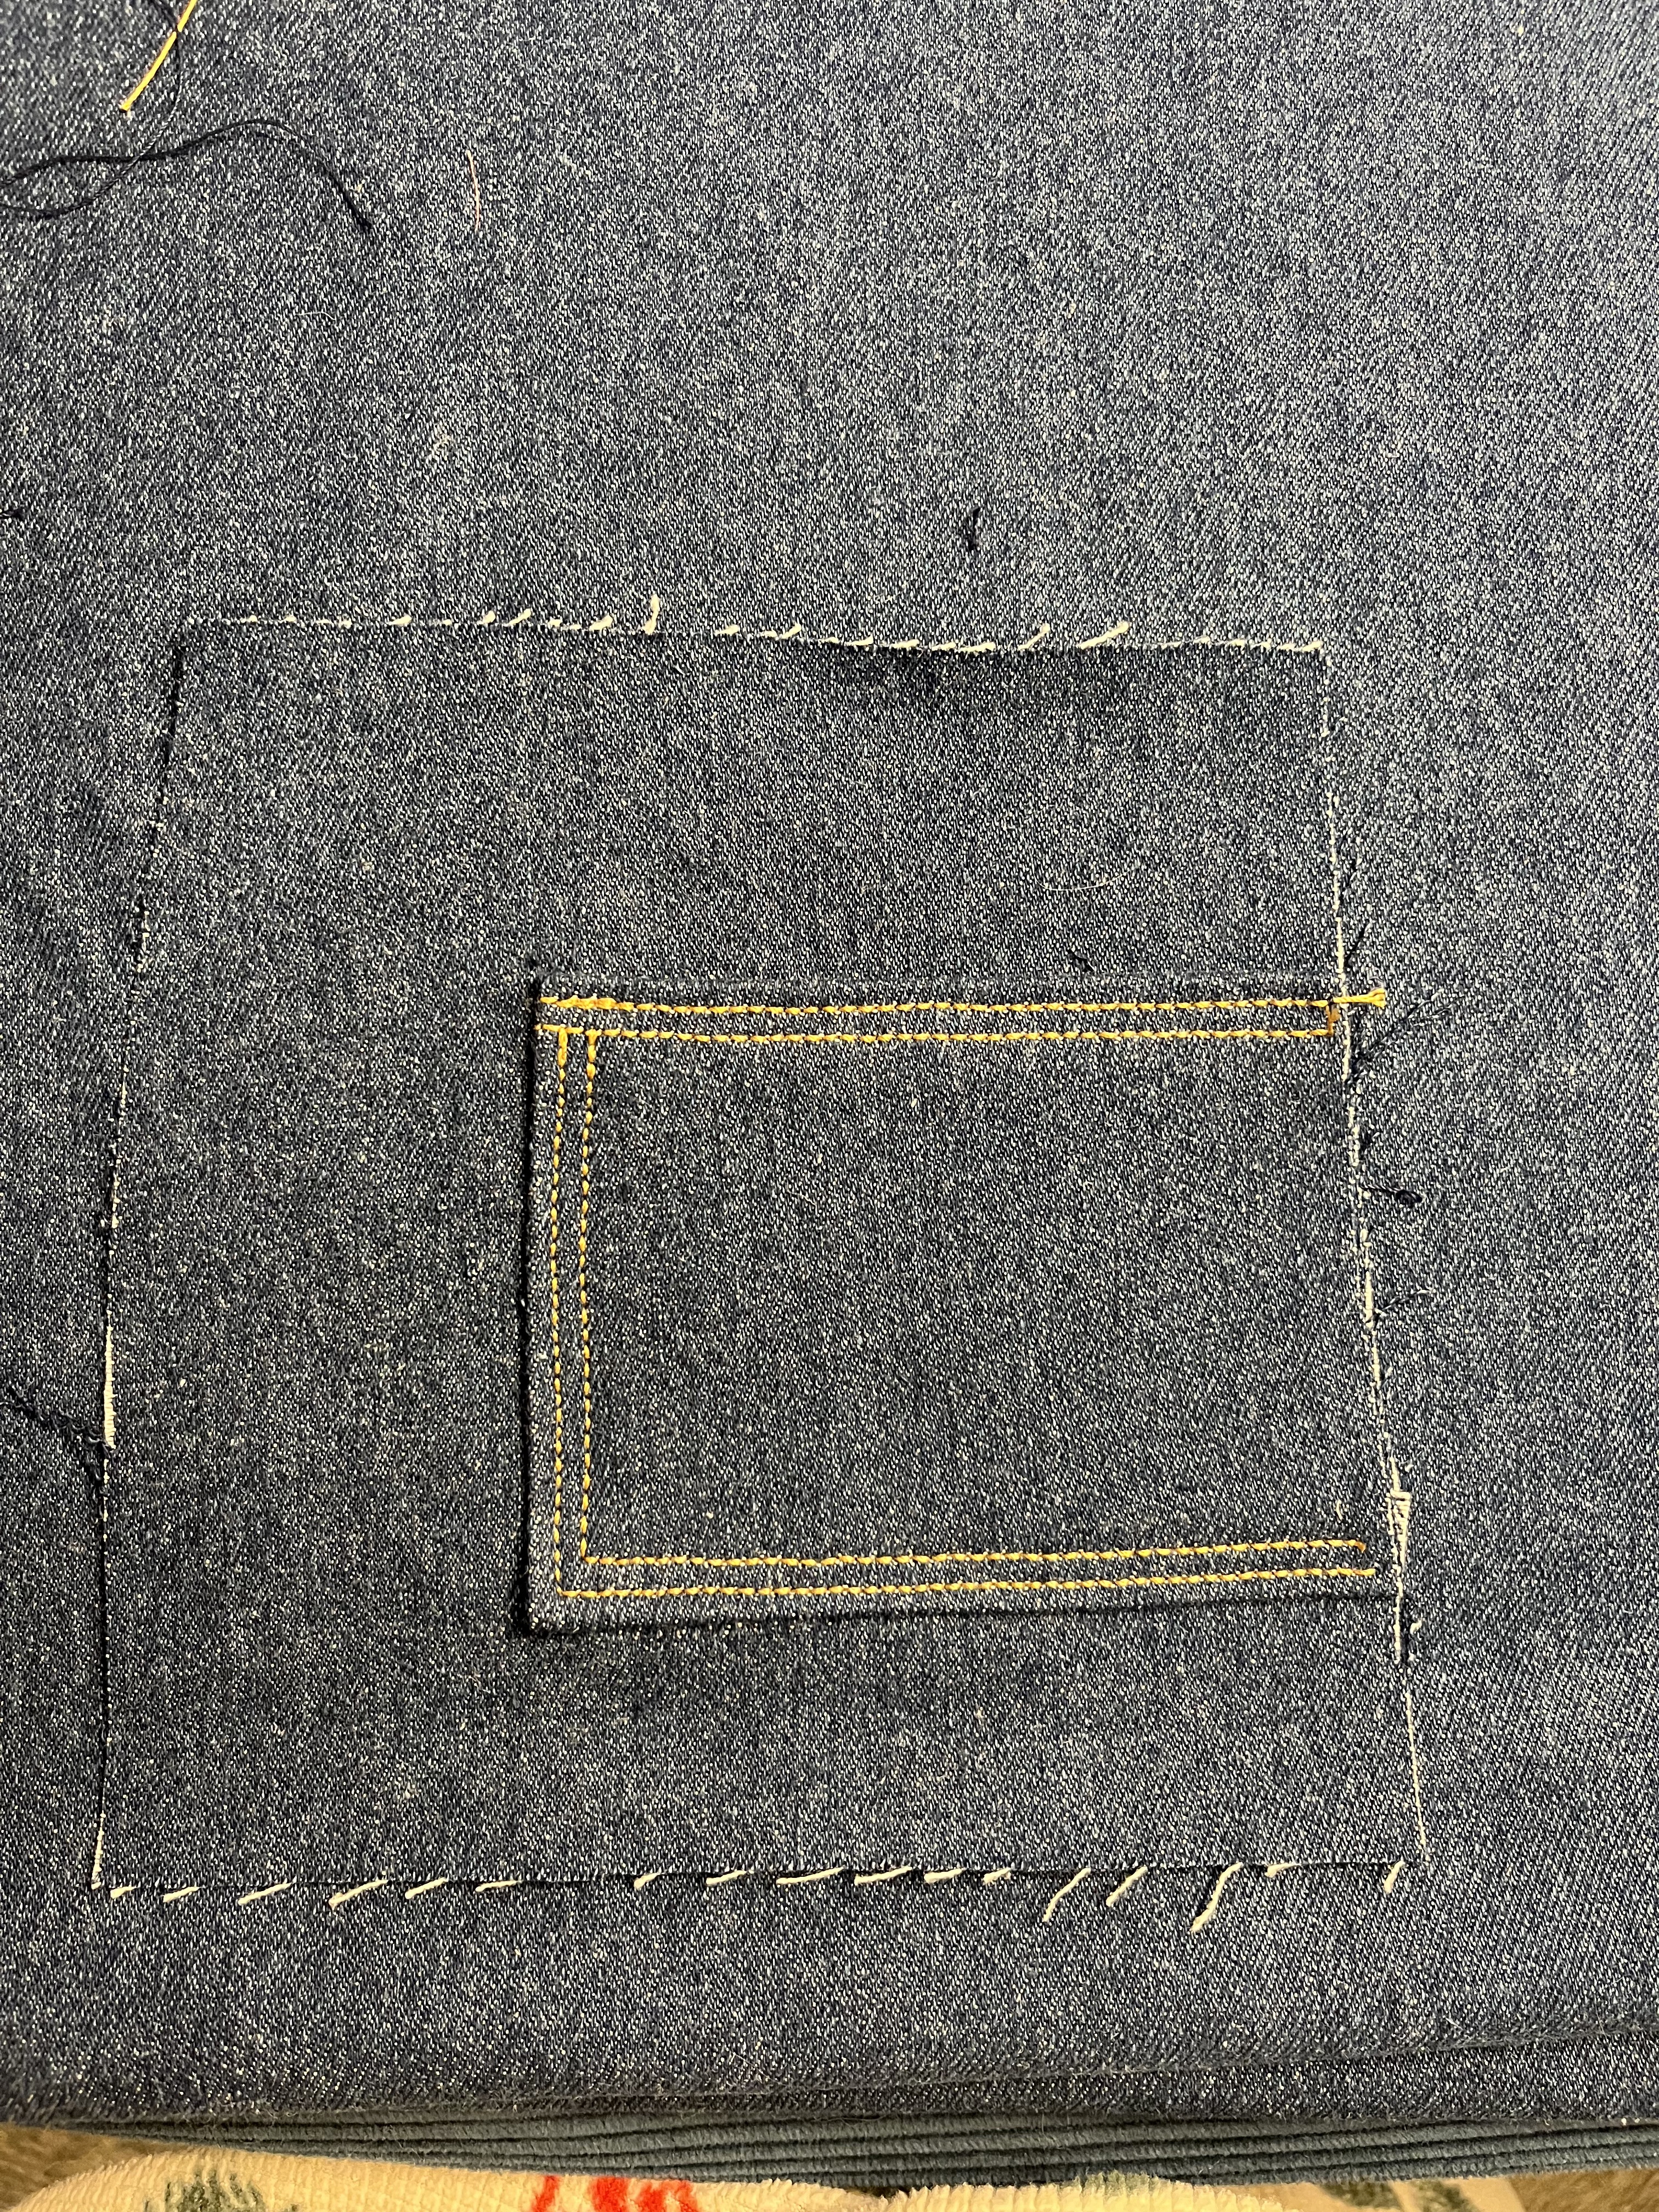
3 pm: with many breaks in between, I managed to finish the twill (see pictures). I think my biggest issue with the twill right now is the way the fabric lays underneath my butt, but I have a feeling that this is due to the cotton fabric I used from my left-over duvet. Now having tried it on, the pants fit great, there is no tightening around my thighs, and the crotch depth is comfortable when sitting down (this was my biggest worry). I have adjusted the length of the pants and I will measure and fold my pattern piece to note this change. I also do believe that the zipper fly is majorly incorrect, but it does zip and the waistband reaches the exact points it should, so as far as fit, I think it works!
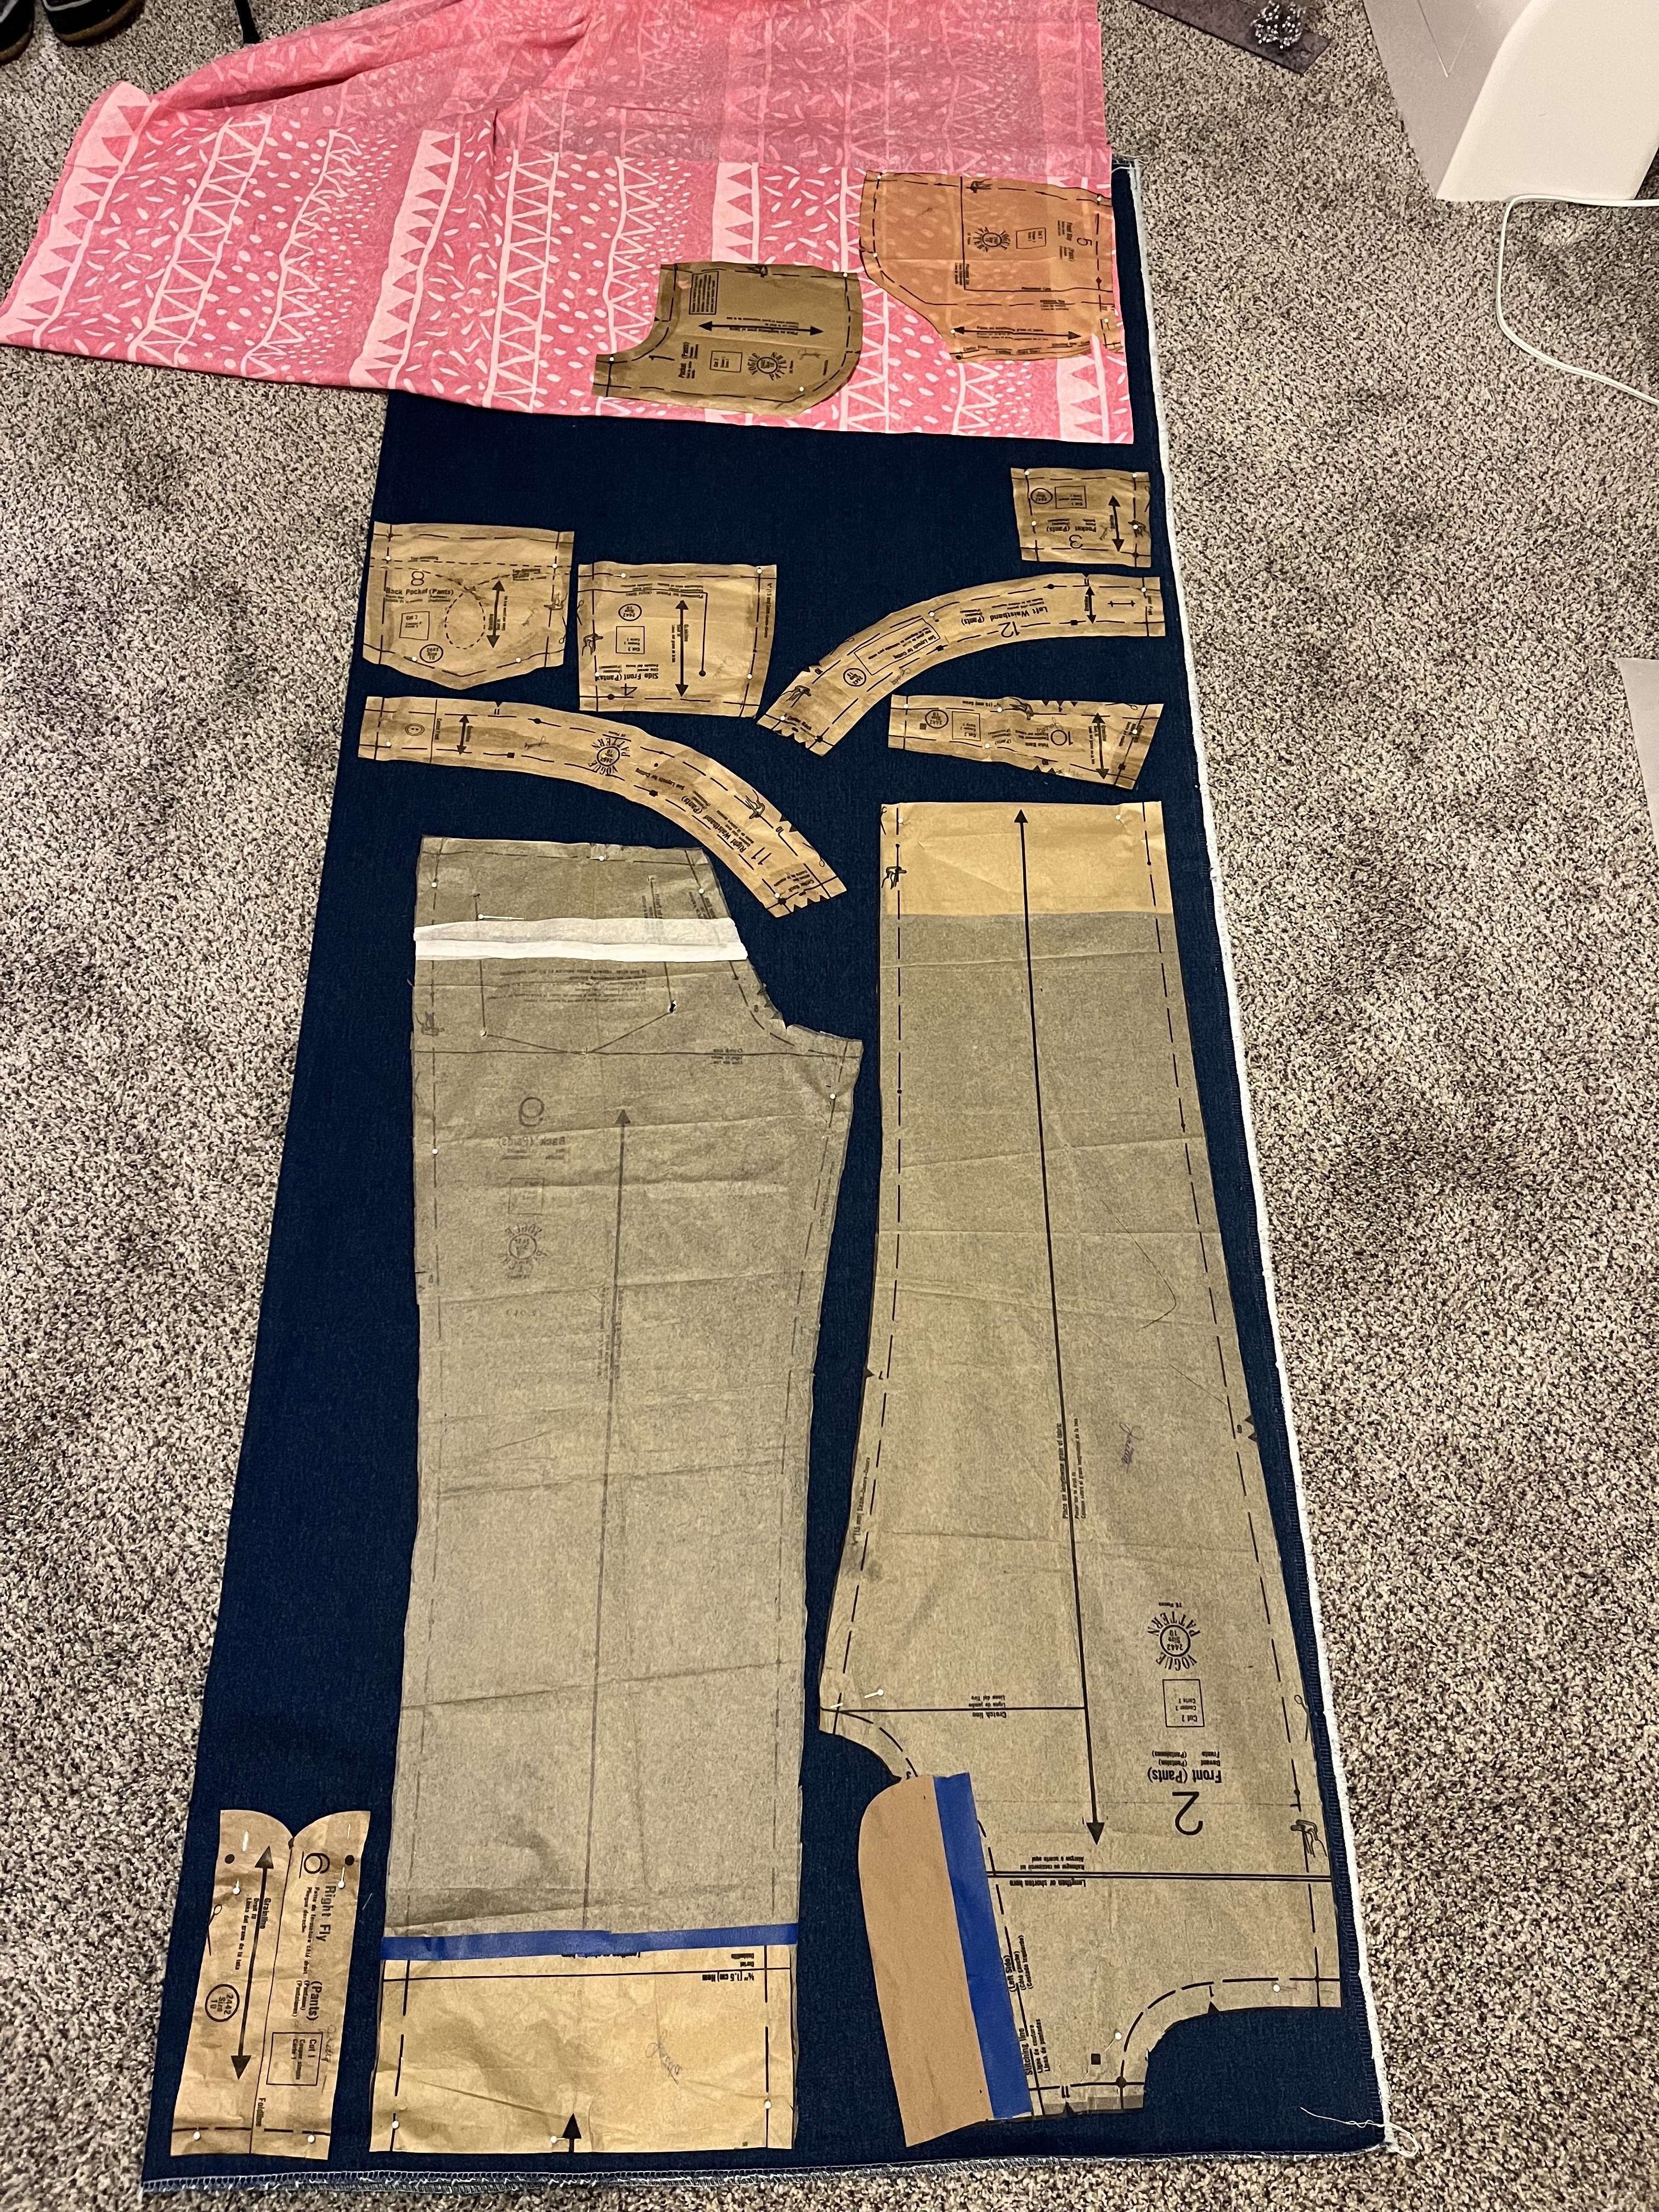
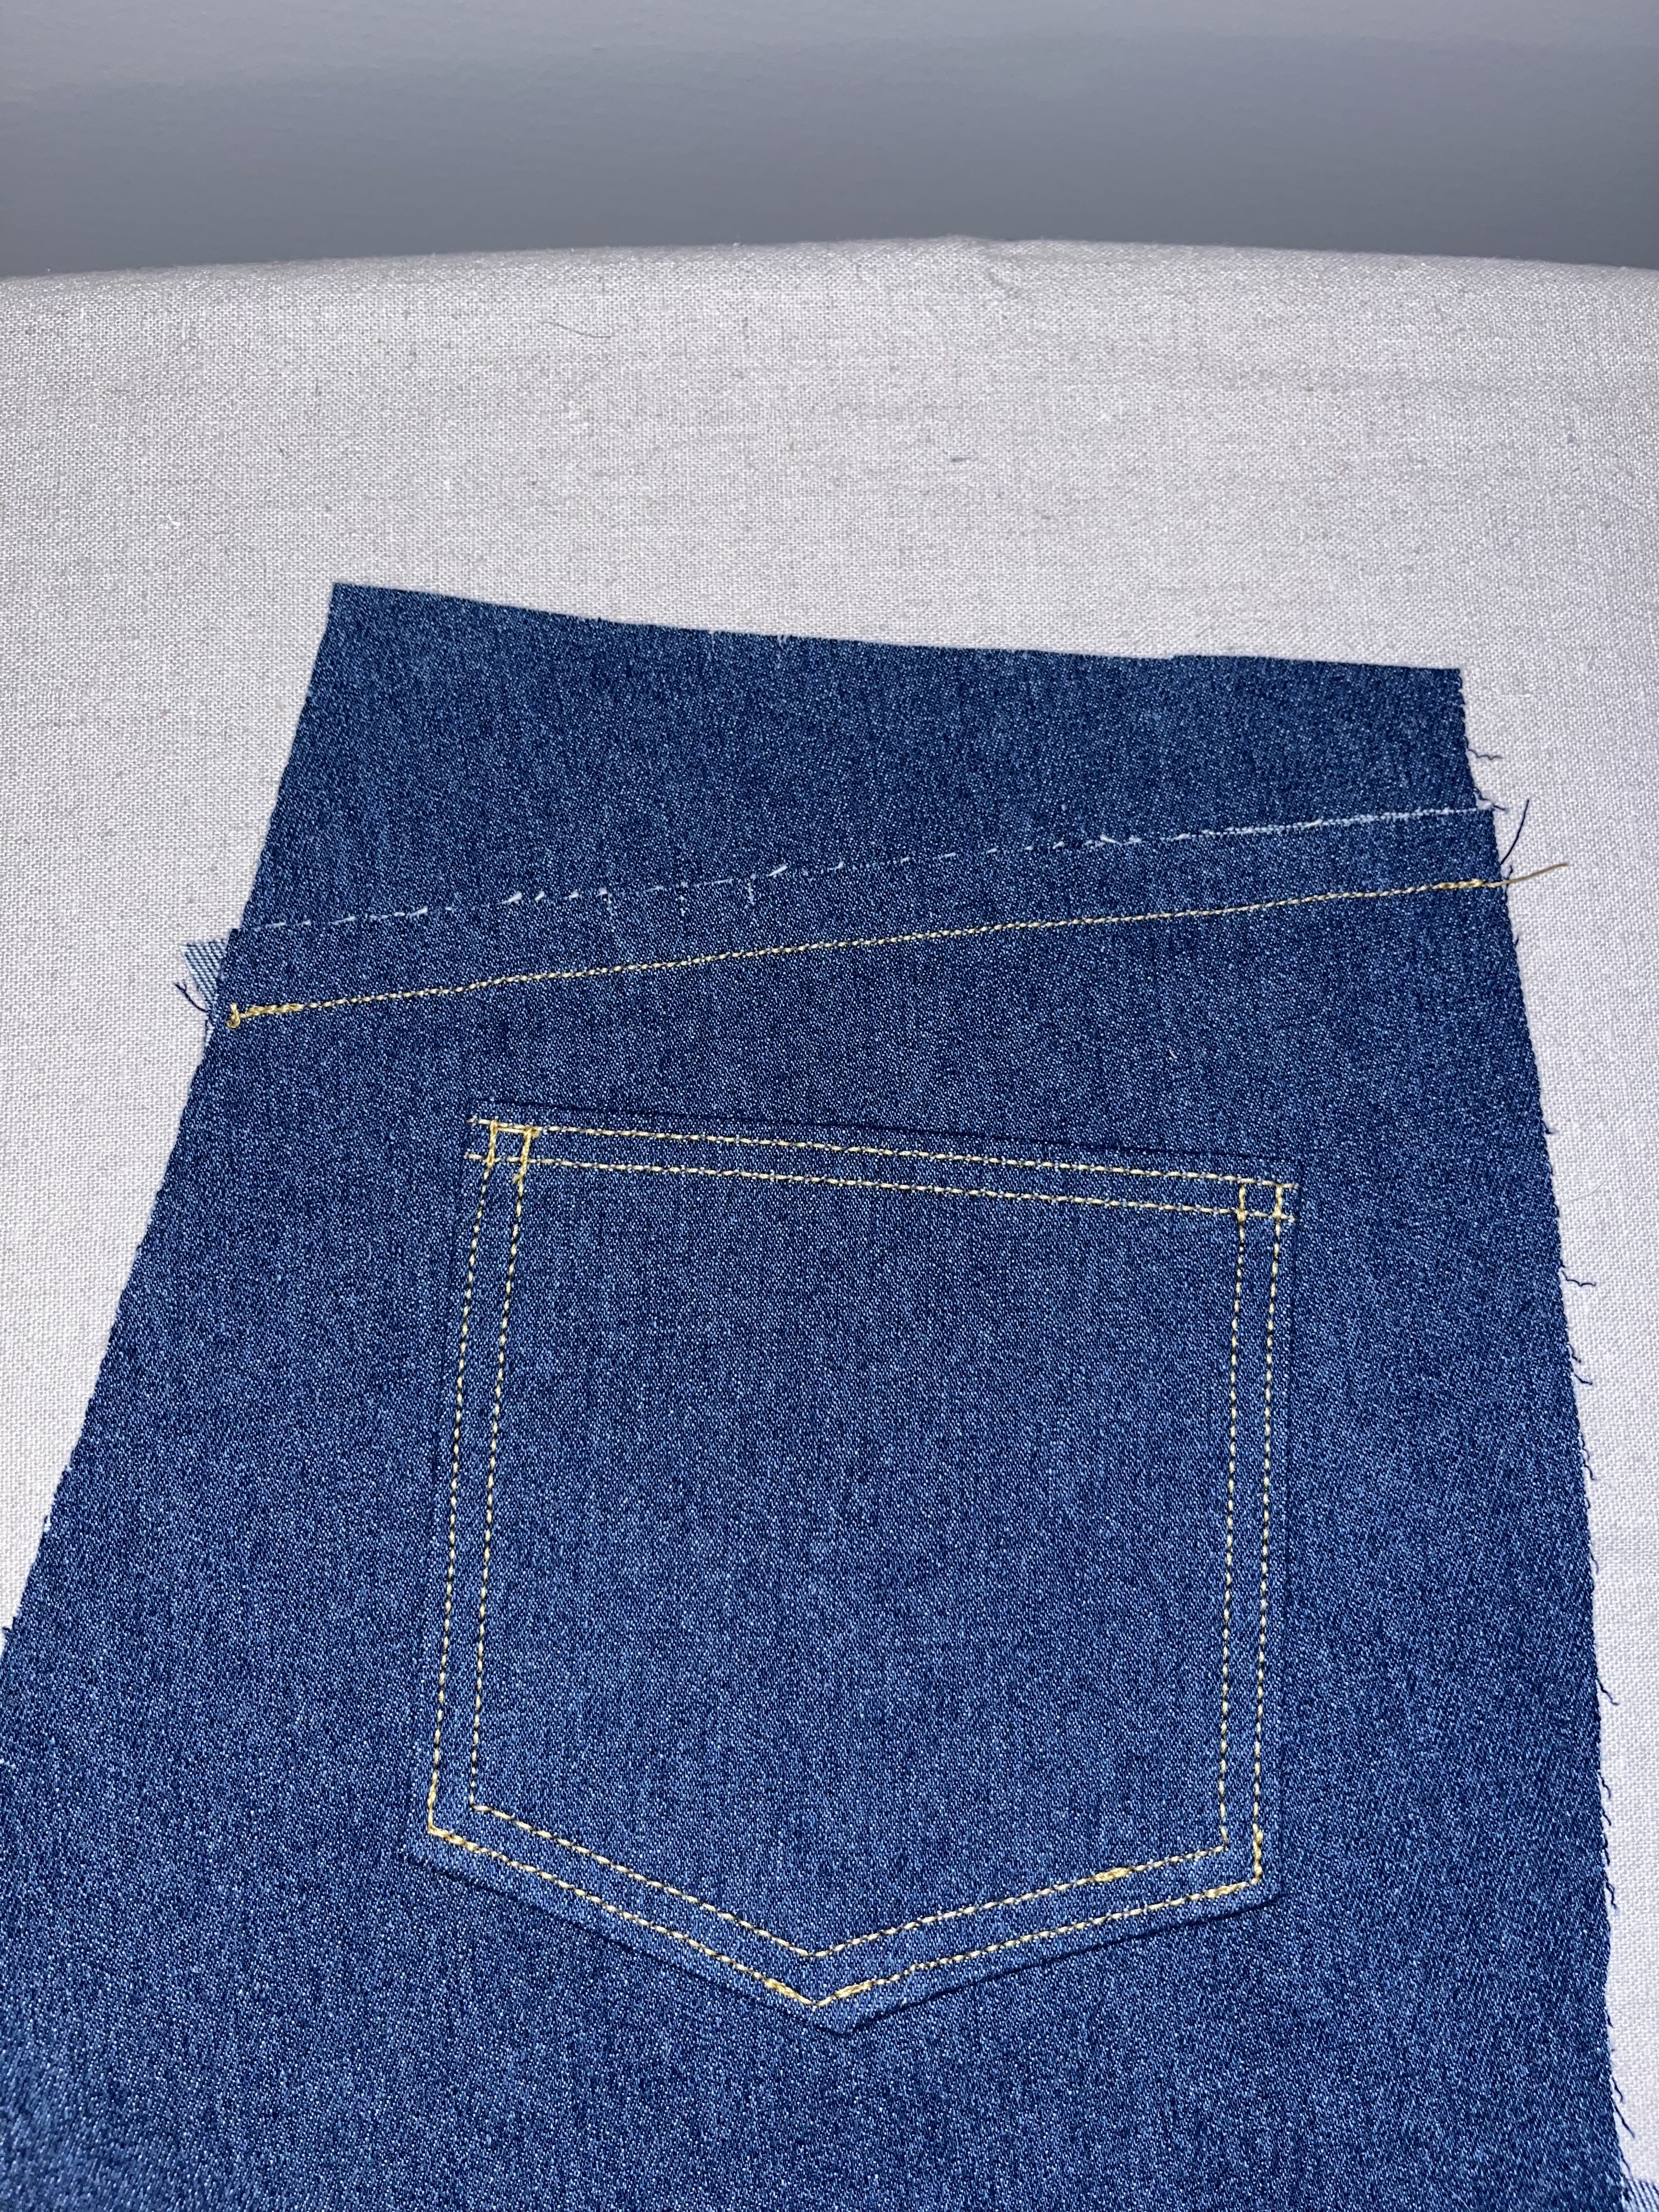
9pm: I have ironed my denim fabric, and laid out and pinned my pattern pieces with the grain going in the correct direction so all that’s left to do it cut. I also found and read extra instructions from “Calvin Klein” and will cut out my pockets and front pocket stay in a lightweight cotton to avoid extra bulk. Which is the perfect opportunity to use this fun pink print cotton fabric to add a little pop on the inside. I have had this fabric for a while, and it was intended for a blouse but given that I don’t like too many prints, I will use it on the inside of a garment.


Day 5 (2/04): Sewing Time
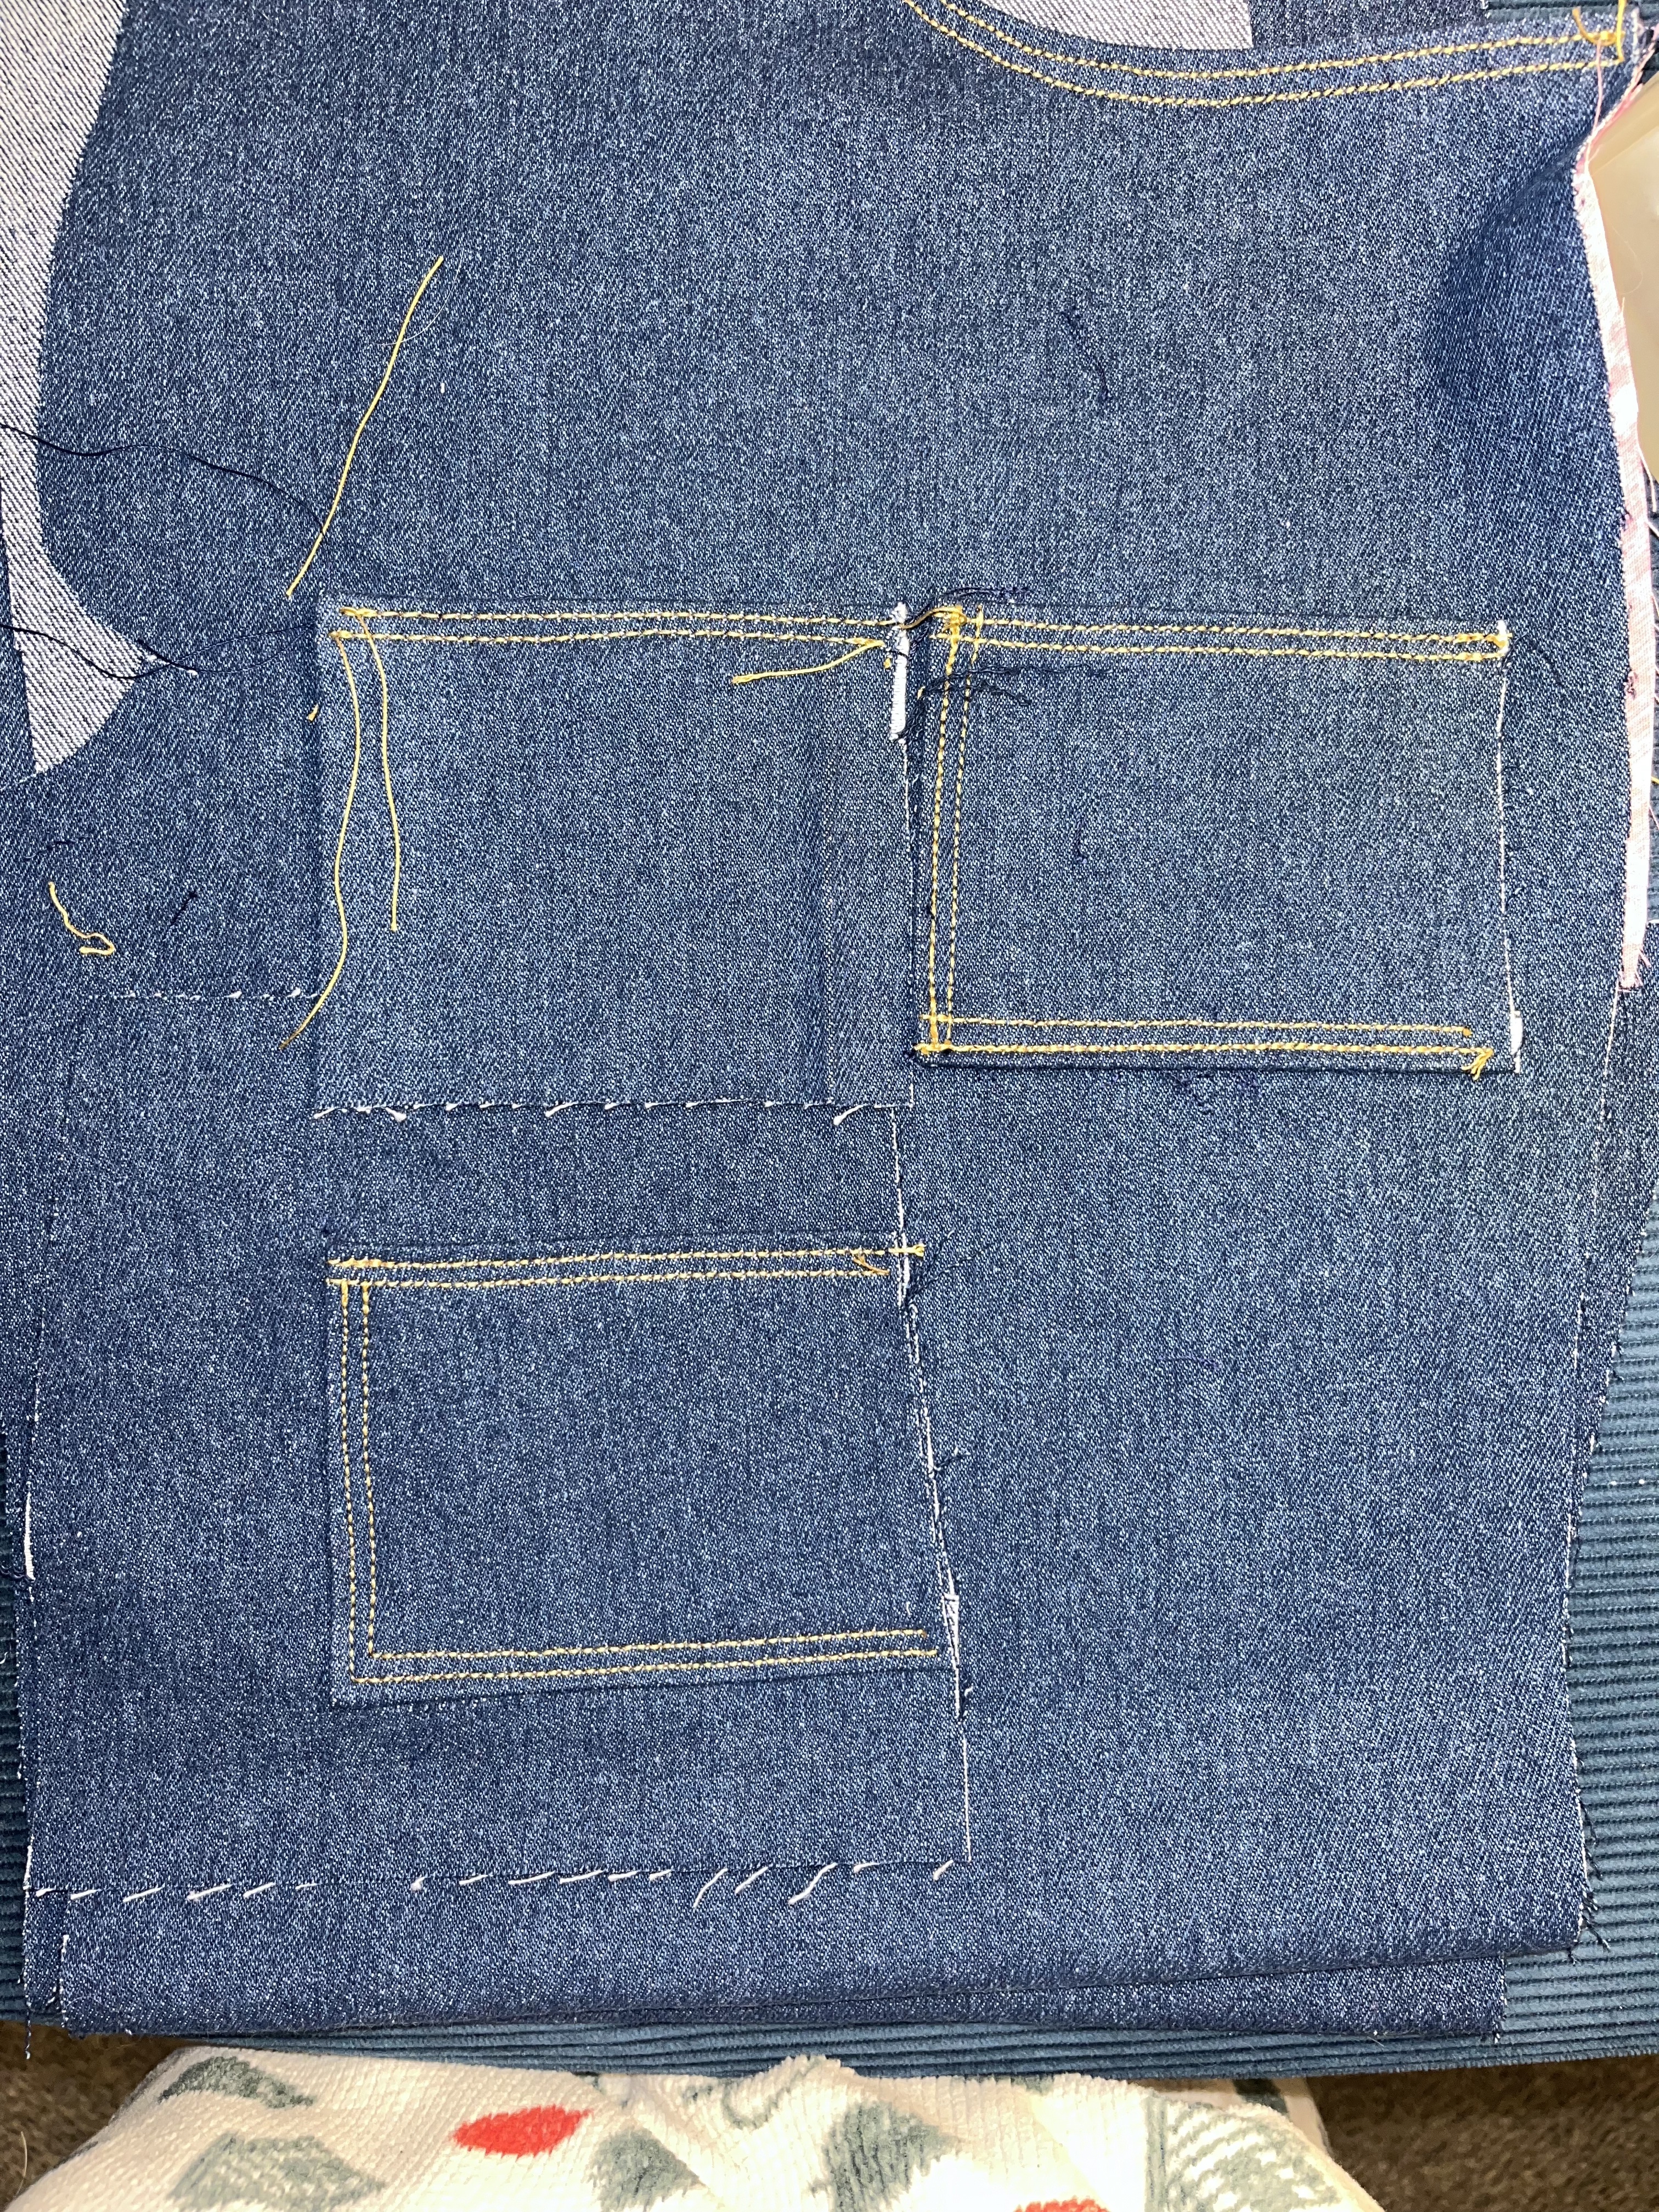
2:30pm: Had a late morning start which is my preferred sunday ritual. I have begun sewing my pockets to the front. I didn’t get as far as I thought I would today, but along with buying the denim fabric, I also bought the classic denim thread and I didn’t think it would be much of a difference, but because it’s a lot bulkier and one can see the imperfections much more. This started to become apparent when I started sewing the tiny coin pocket. Each fold/stitch, gets a stitch line close to the fold and then a top stitch a little further away. I had accidently cut 2 pieces out, instead of 1; so I used this as an opportunity to sew it better, and this one was good enough at the time. Once I finished that, it was time to stitch it to another panel, and here is where a lot of mistakes began to happen. At one point I stitched the pocket opening closed and this is when I knew I needed to give the project a break.
Day 6 (2/05): Pockets
I have come back to the challenging coin pocket. I decided that after all, the stitching was not up to my standards and I knew I could do better, so I cut out a new pattern piece and began the process all over….I’m glad I did this because the pocket now looks a lot better and those silly mistakes that happened before were avoided this time!
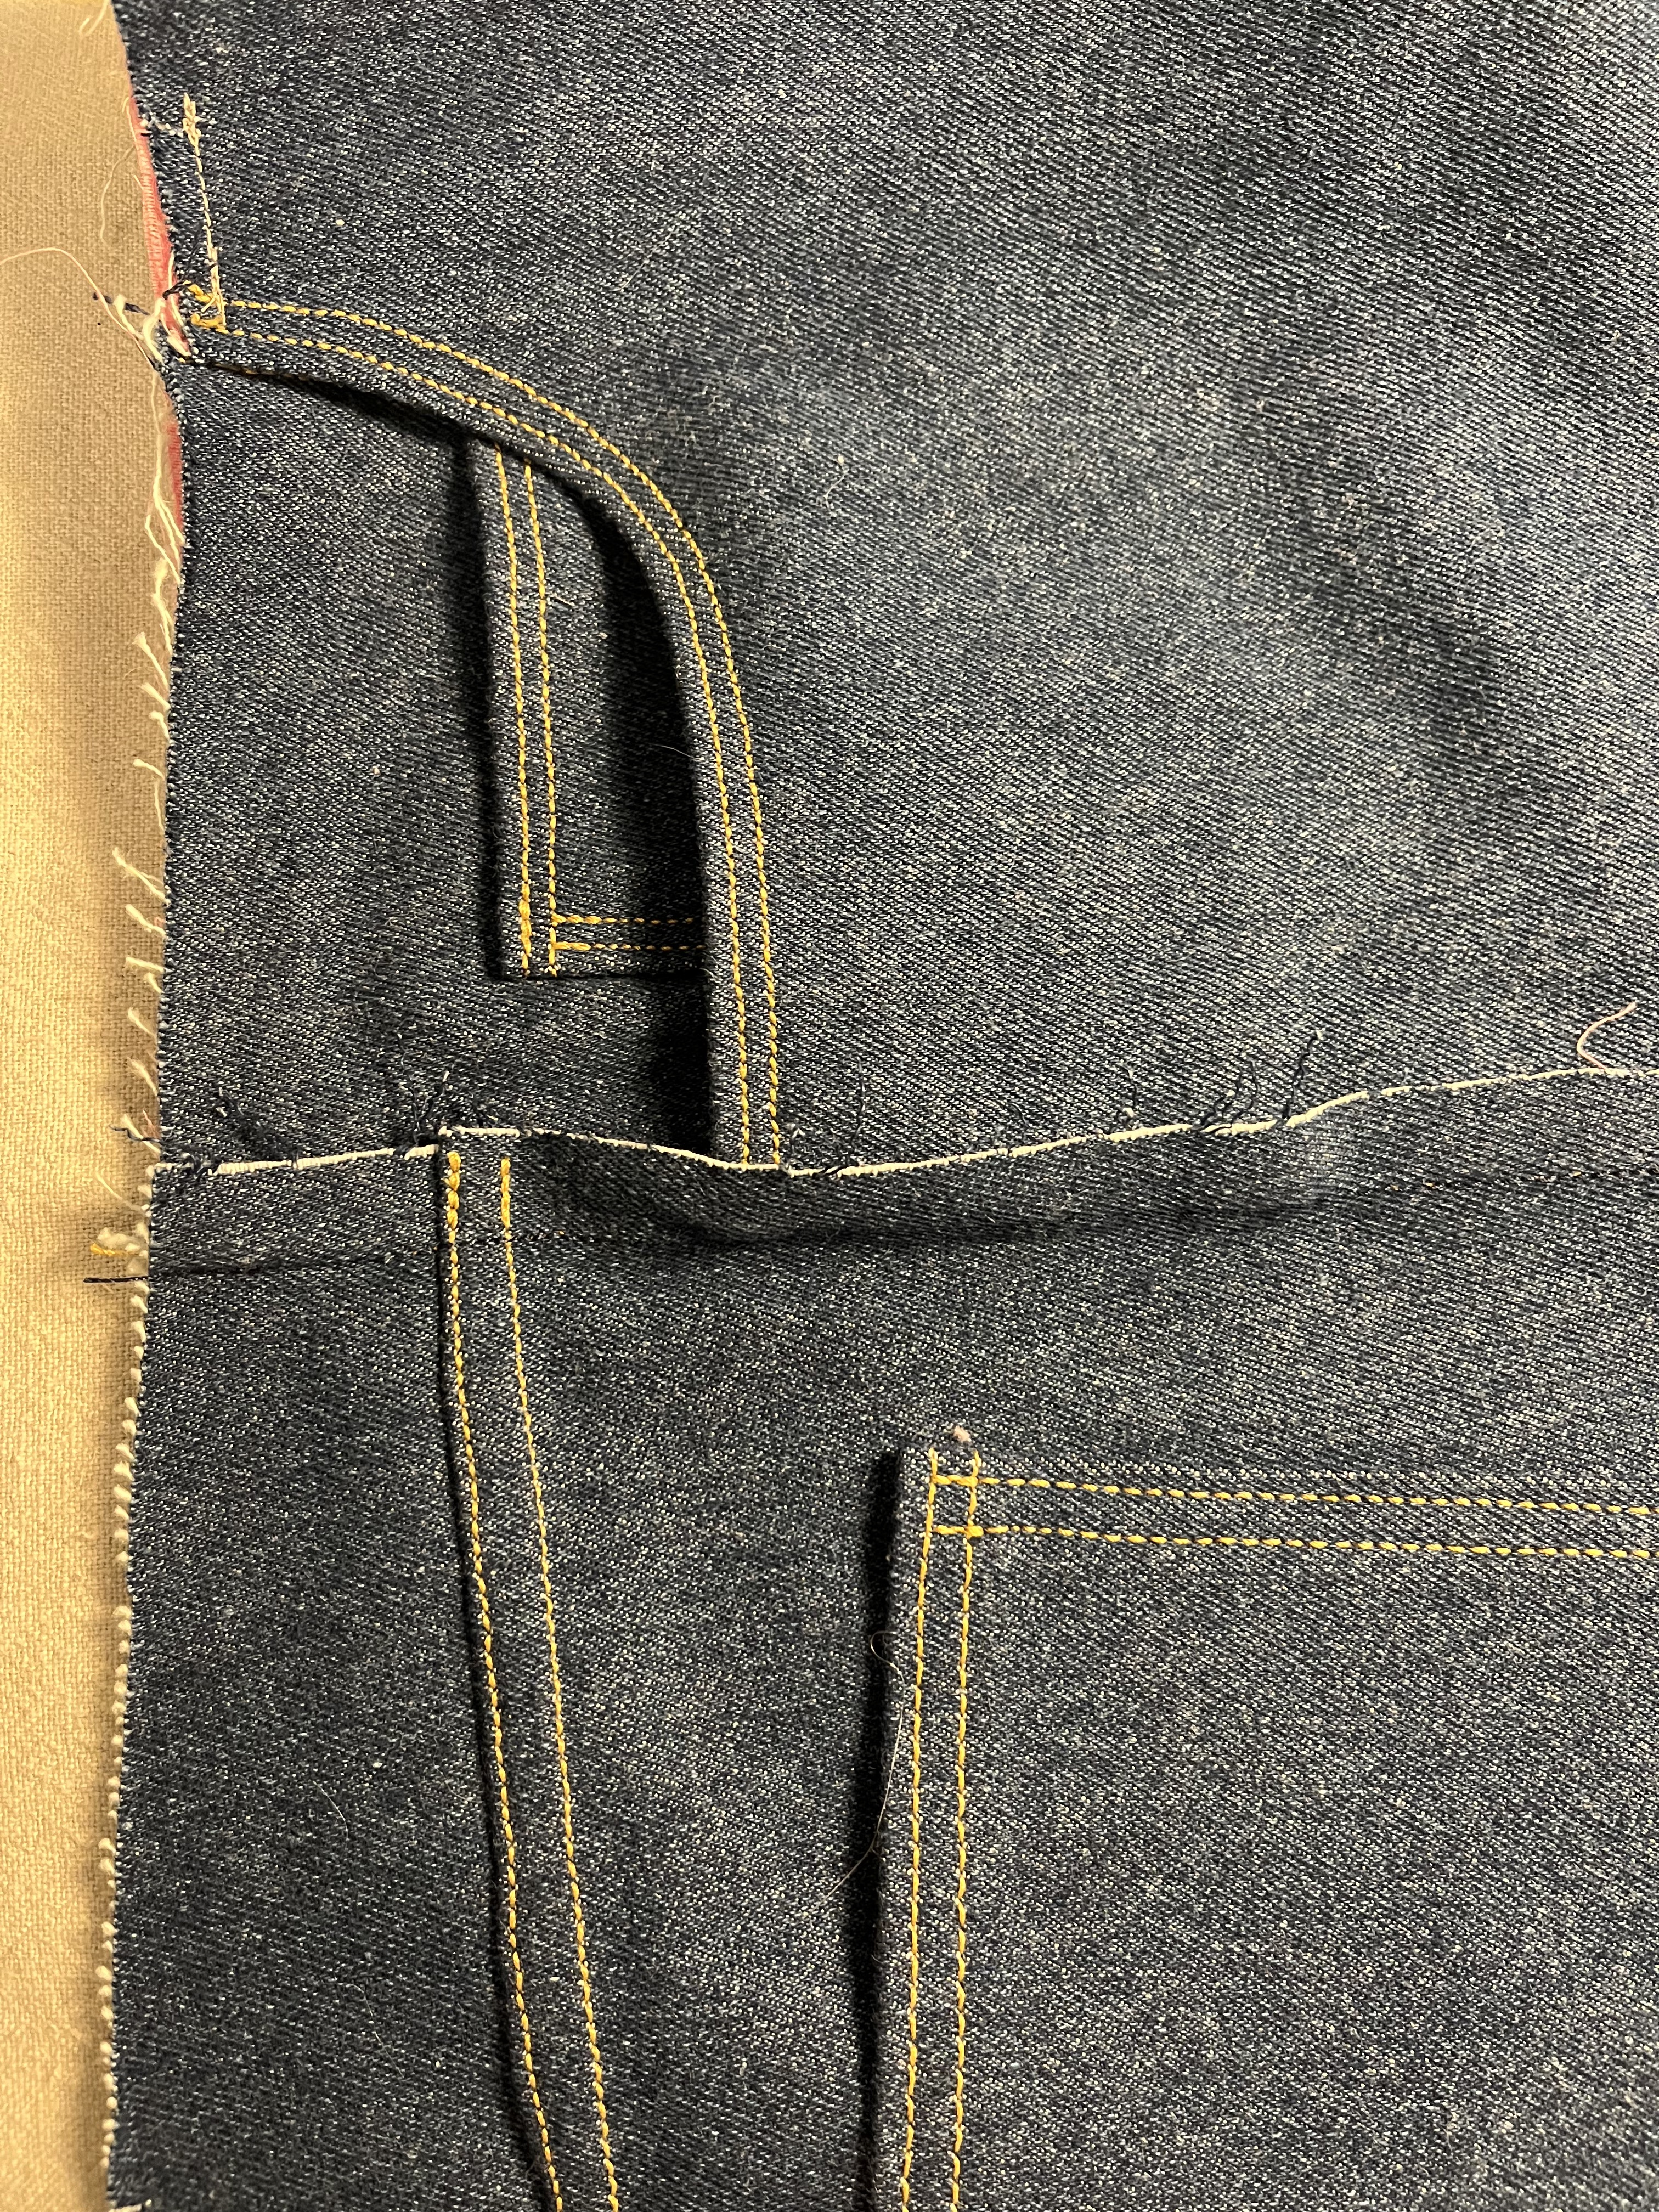
I continue onto attaching the rest of the pieces that make the pocket and after this, I began to tackle the zipper and zipper fly. I had mentioned that the pattern came with additional instructions, and one of those was a “easy front fly” and though some of the instructions are still a little blurry in my minds eye, they came with little hand-drawn illustrations to help me out!
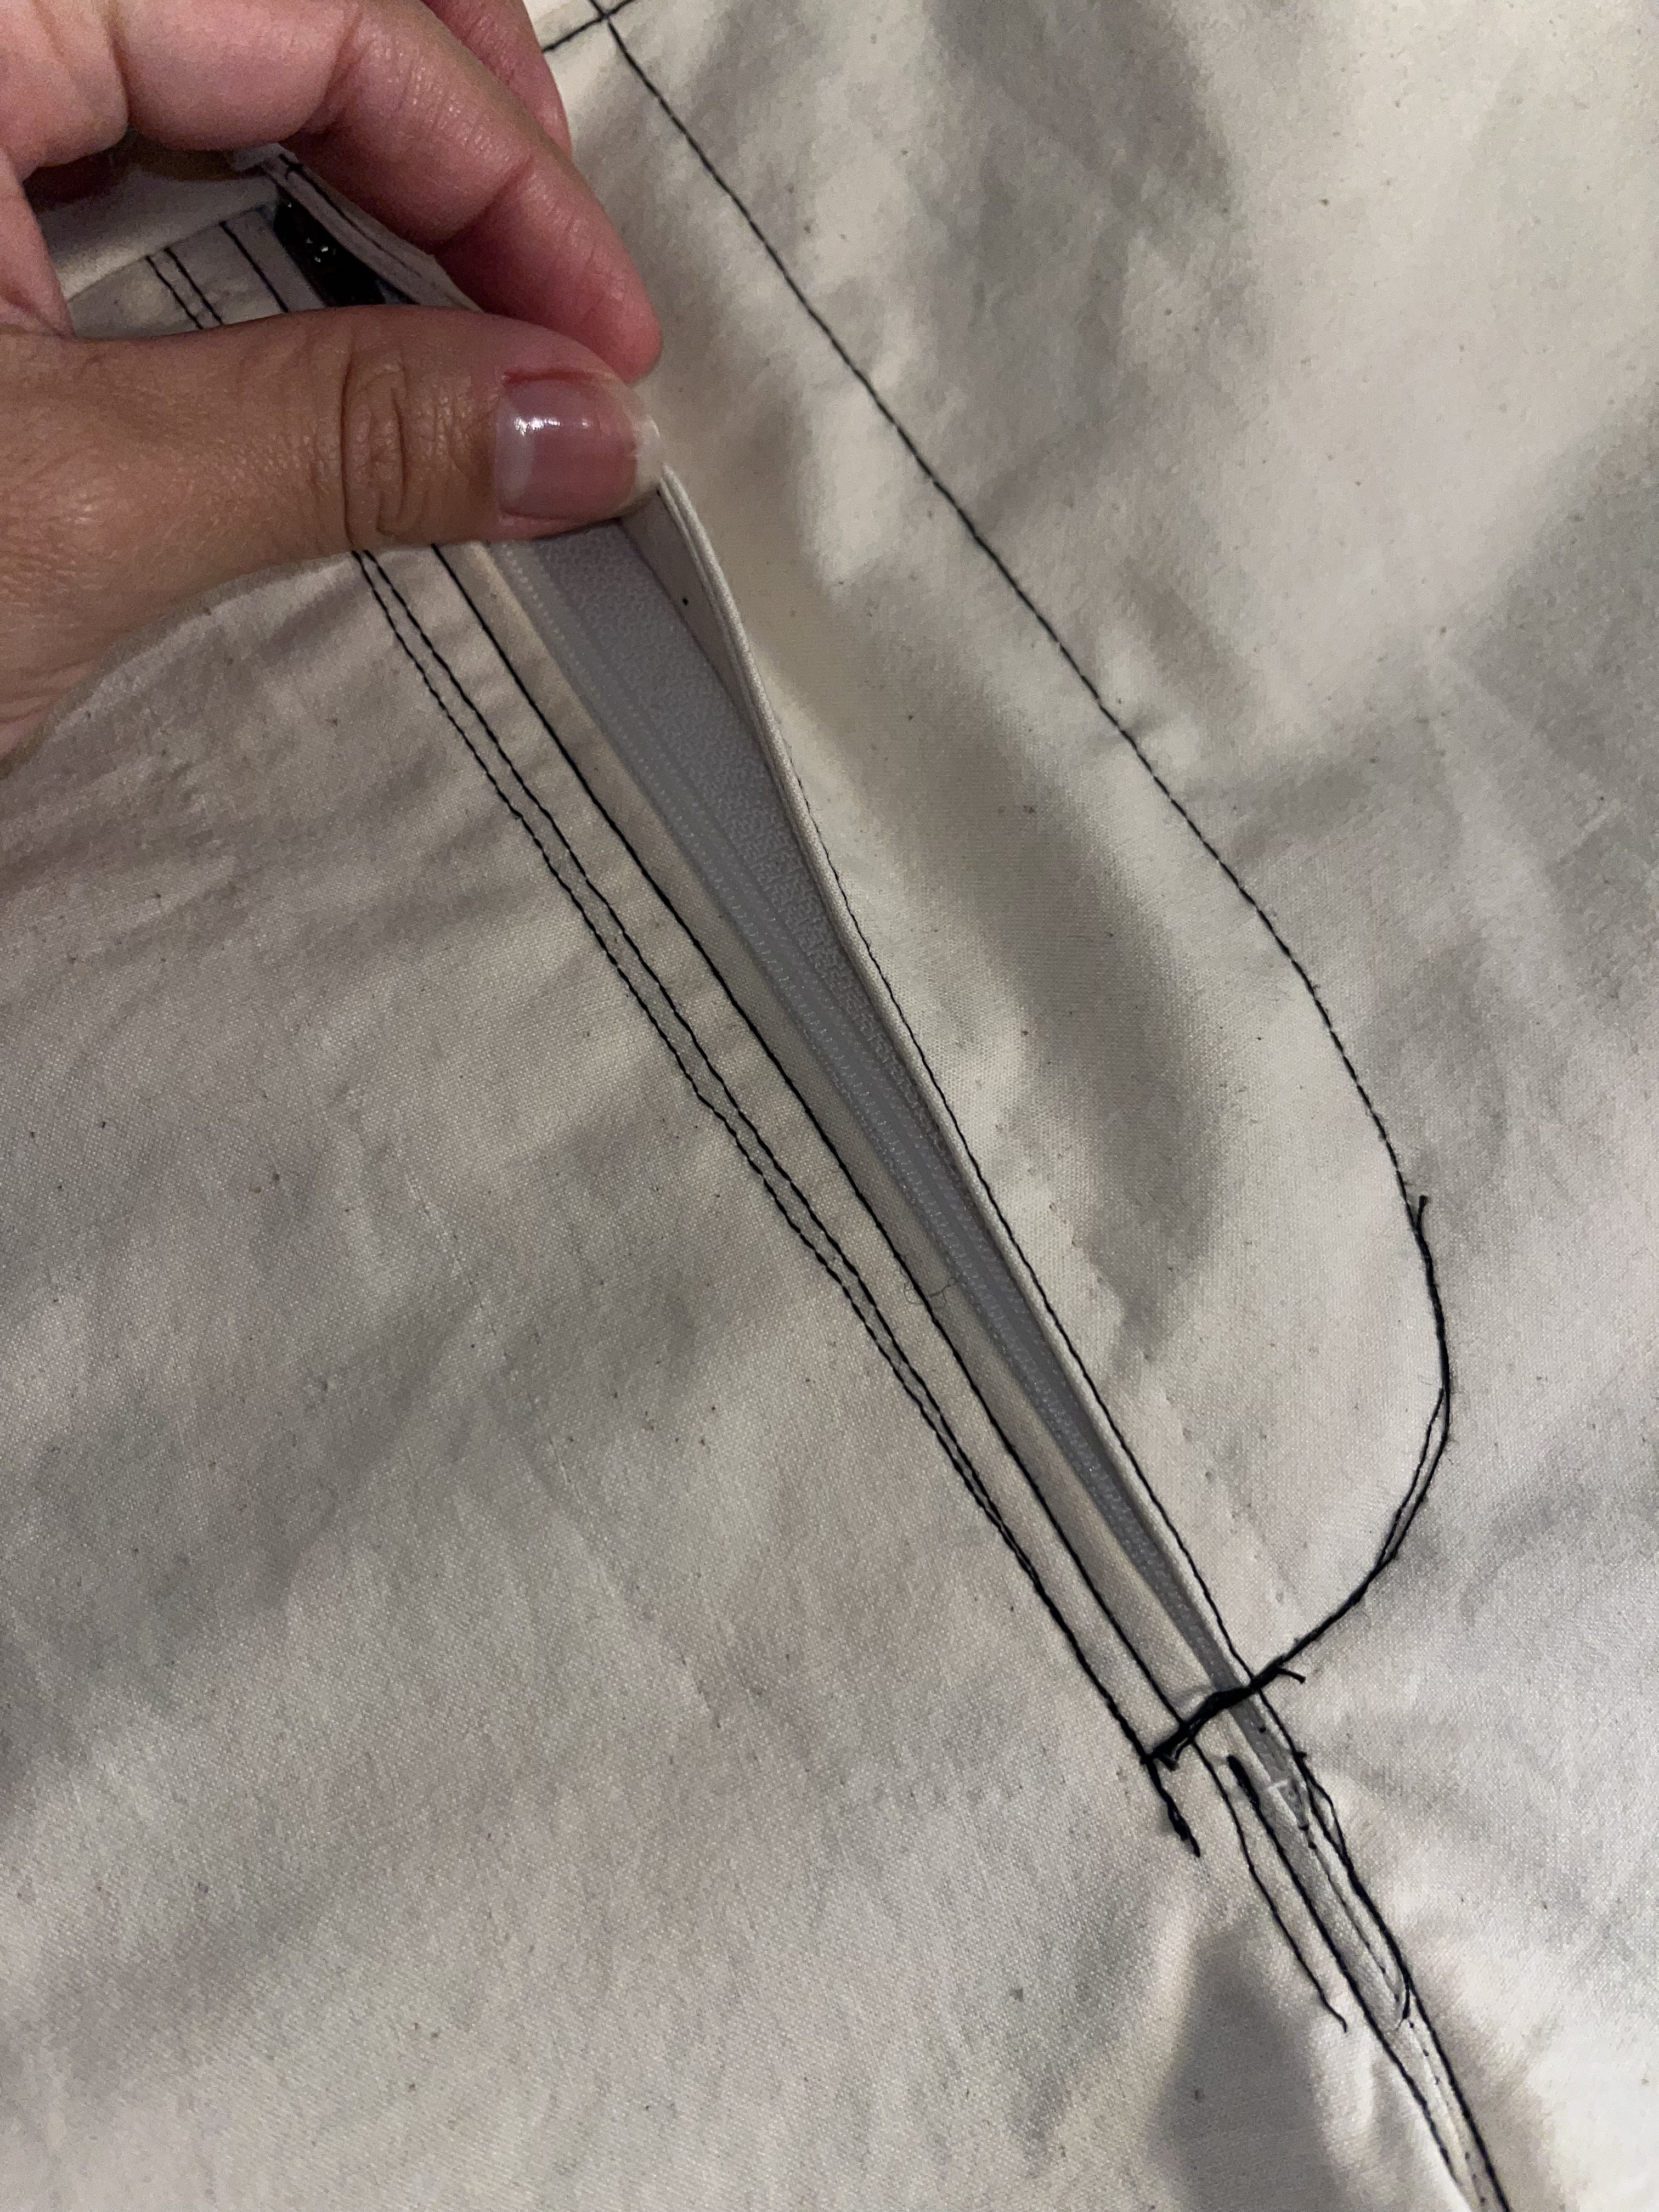
Day 7 (2/06): Zipper Fly
I am back to the zipper fly! Most of the work has been done and the fly is looking way different than the twill…which I am thankful for. Now all I had left to do, is the curvy top-stitch on the left side, a straight stitch on the right side, and a bartack stitch at the end of the zipper fly to reinforce the closure…Once I finished the steps, I moved on to the back pockets. The pattern recommends that you find yourself a pocket topstitching design to make it more of your own, or simply use the design on the pattern, but after looking on Pinterest for about 5 minutes, I went with no design and just wanted to keep it simple with 2 stitching lines. As I was pressing the edges in so I could sew them down, I remembered that I have a “double-sided stay-tape” and I could use it to ensure my folds would stay in place while I sewed the pockets to the back pants piece…and what would you know, it worked. The edges ended up looking a lot crispier and flatter than before!
Day 8 (2/07): Yolk + Side Seam
Nowhere in the pattern instructions does it talk about flat-felled seams, and this is something that is found in majority if not all jeans.
After prepping my pieces, I chose to use the method that I am used to, which is:
1: sewing the wrong sides together
2: cutting one seam allowance down to 1/8″-1/4″
3: fold the long seam allowance over the short seam allowance
4: stitch seam fold down on edge
As I was sewing the side seams of the front and back pieces, I noticed I was running out of my gold jean thread, and would only be able to sew the sides together but would not have enough for the the top-stitching. I decided to proceed with the blue jean thread and the whole time as I was sewing the flat felled seam, I was so scared – worried I would mess up. Spoiler, it all turned out fine but at the end I told my husband I was running out of thread and he convinced me to just order more online and while I wait I could start another project…this turned to be a far greater ask than I ever expected. After a week of highs and lows I decided to go to my local Hobby Lobby (not my favorite place) and purchase the thread, which turned out to be a big win because they were having a sale and the tread was less than $2!!!
Day Unknown – continue sewing
After I purchased the thread I began sewing, and did not keep track of my progress since at this point I was just happy to continue my project!
Now having an abundance of thread I decided that the flat-felled seam I sewed was not up to my standard (once again) and in order to remove some bulk I would just sew a regular seam, serge the seam allowance and top-stitch it.
This was not as easy as it reads but once I finished it, I assembled the waistband together and attached it to my pants.

Final Product
Once I finished the jeans, I was so excited to try them on and once I did I knew there were some things that I needed to change.
1) Overall the pants were a smidge too loose on my body, enough for 2 fingers to fit between myself and the waistband.
2) But the biggest issue was the drag lines that were happening in the back, under my butt…
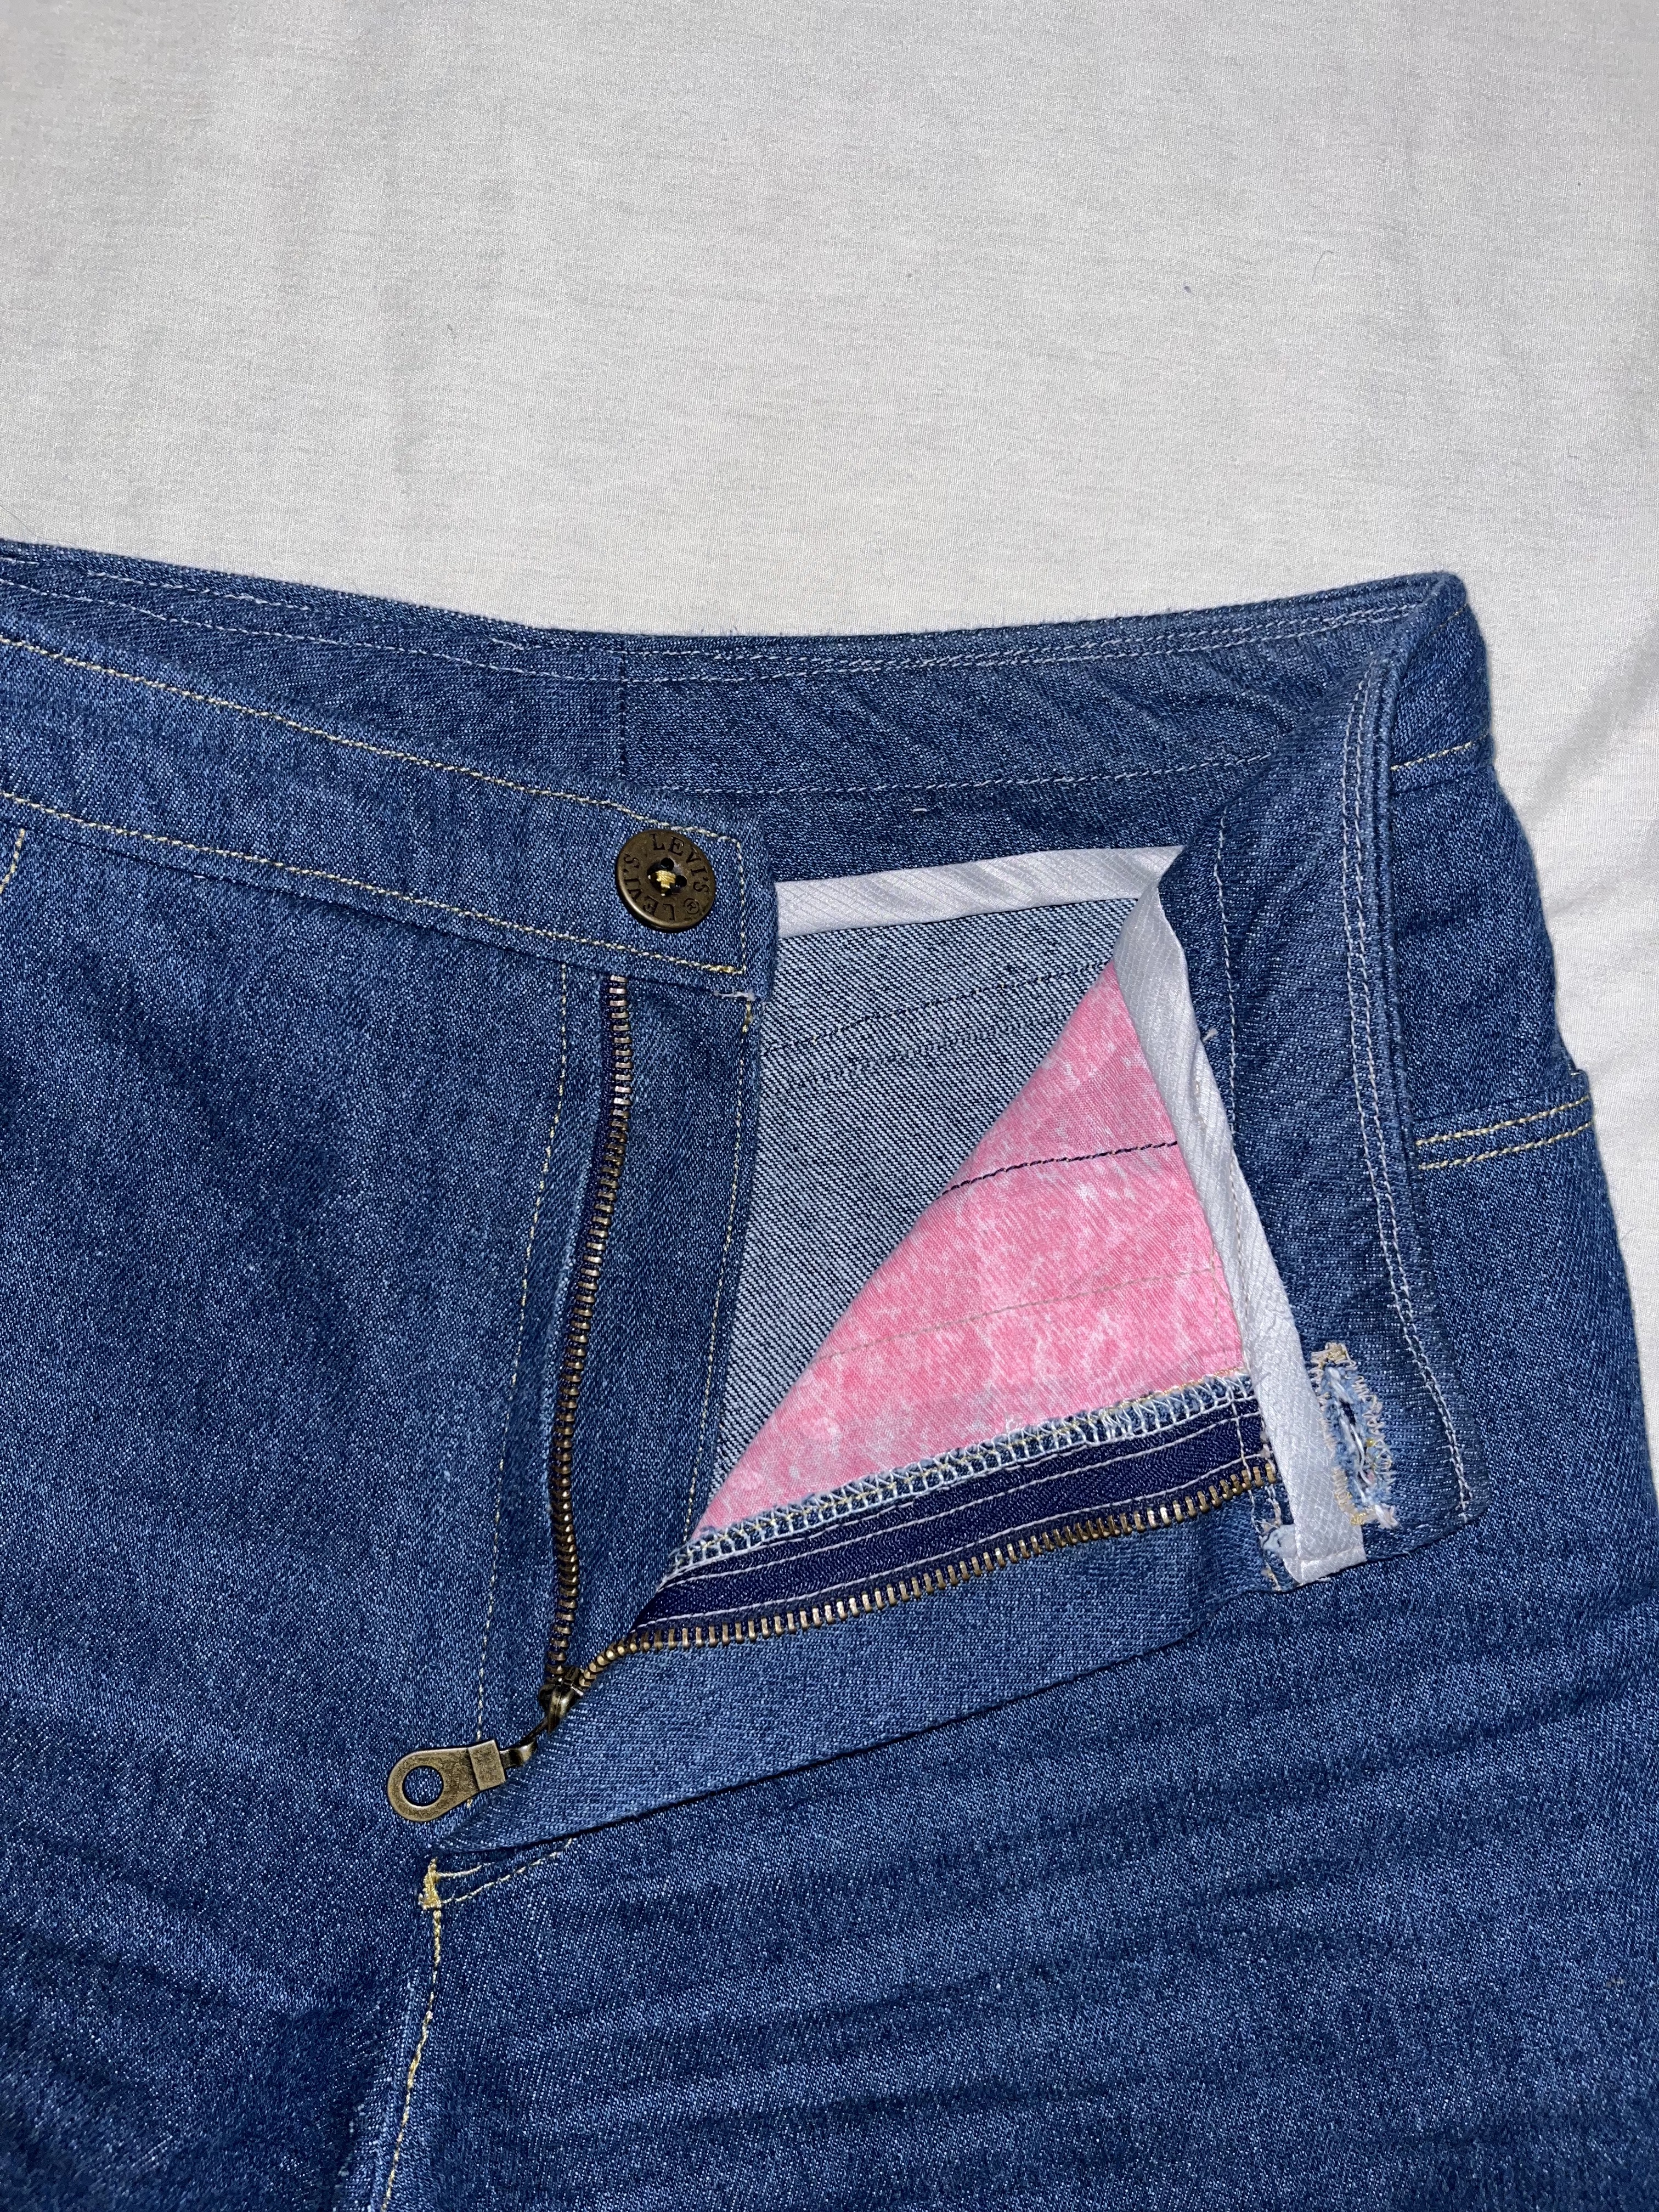
This can only mean one thing…the seam ripper must come out! After doing some research I determined that my saggy legs were caused by a loose inner seam. The pattern called for 5/8″ of seam allowance so I took in another 1/8″ for a complete 3/4″ seam allowance. I also took the side seams ~ 1/8″ and the back center seam around 1/4″ with a slight grading to the crotch to make a butt wedgie (hehe). Lastly I was not satisfied with the finished product of my waistband, so I decided to cut out new pattern pieces and assemble it all together.
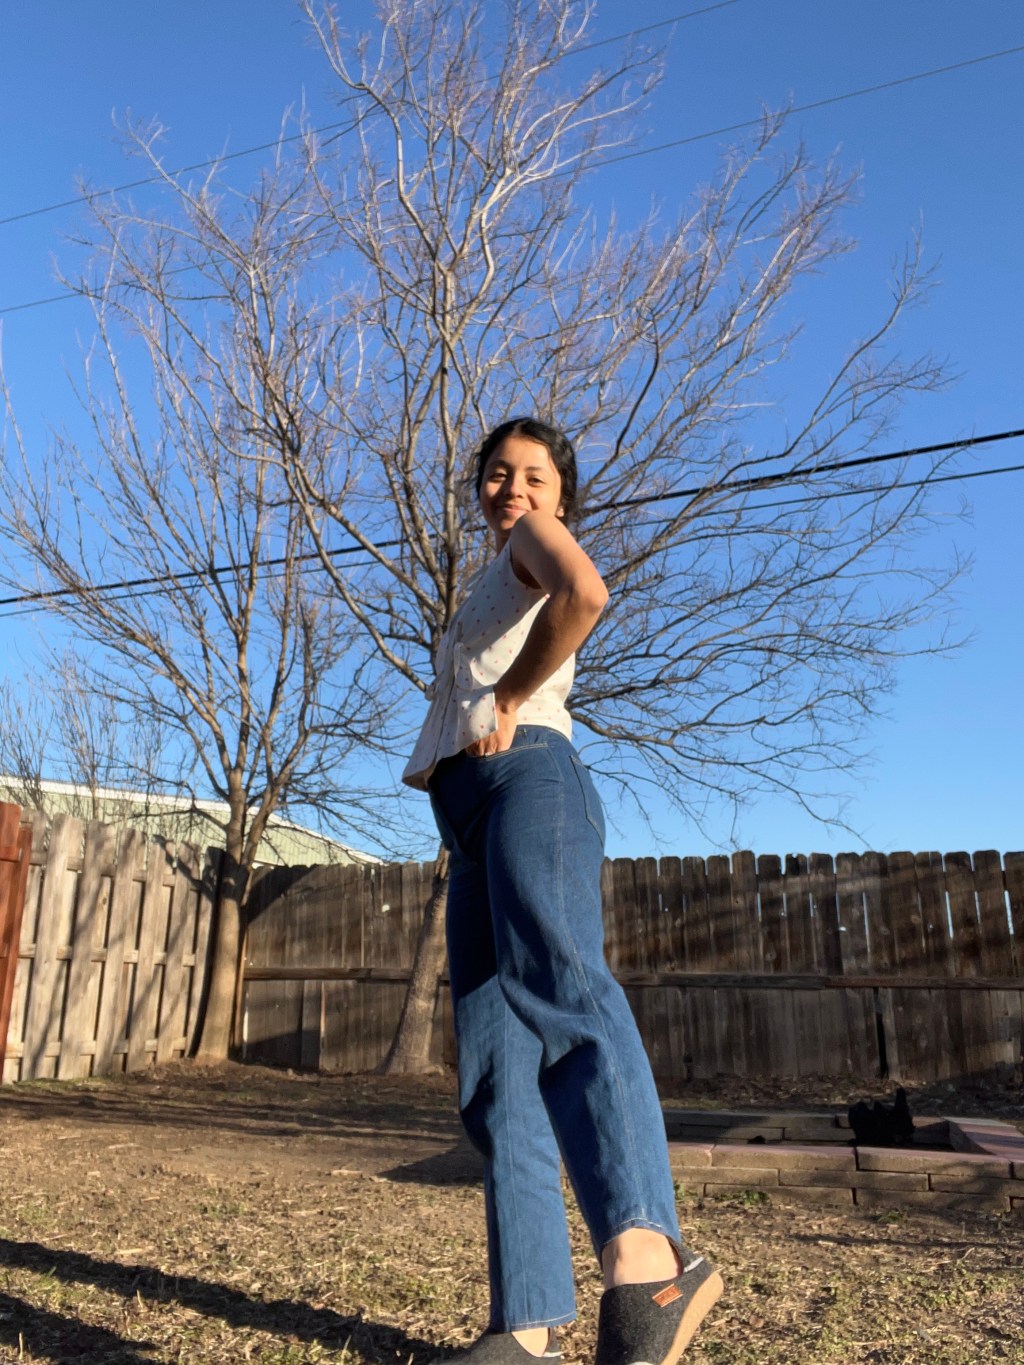
Now for the finished product!!!


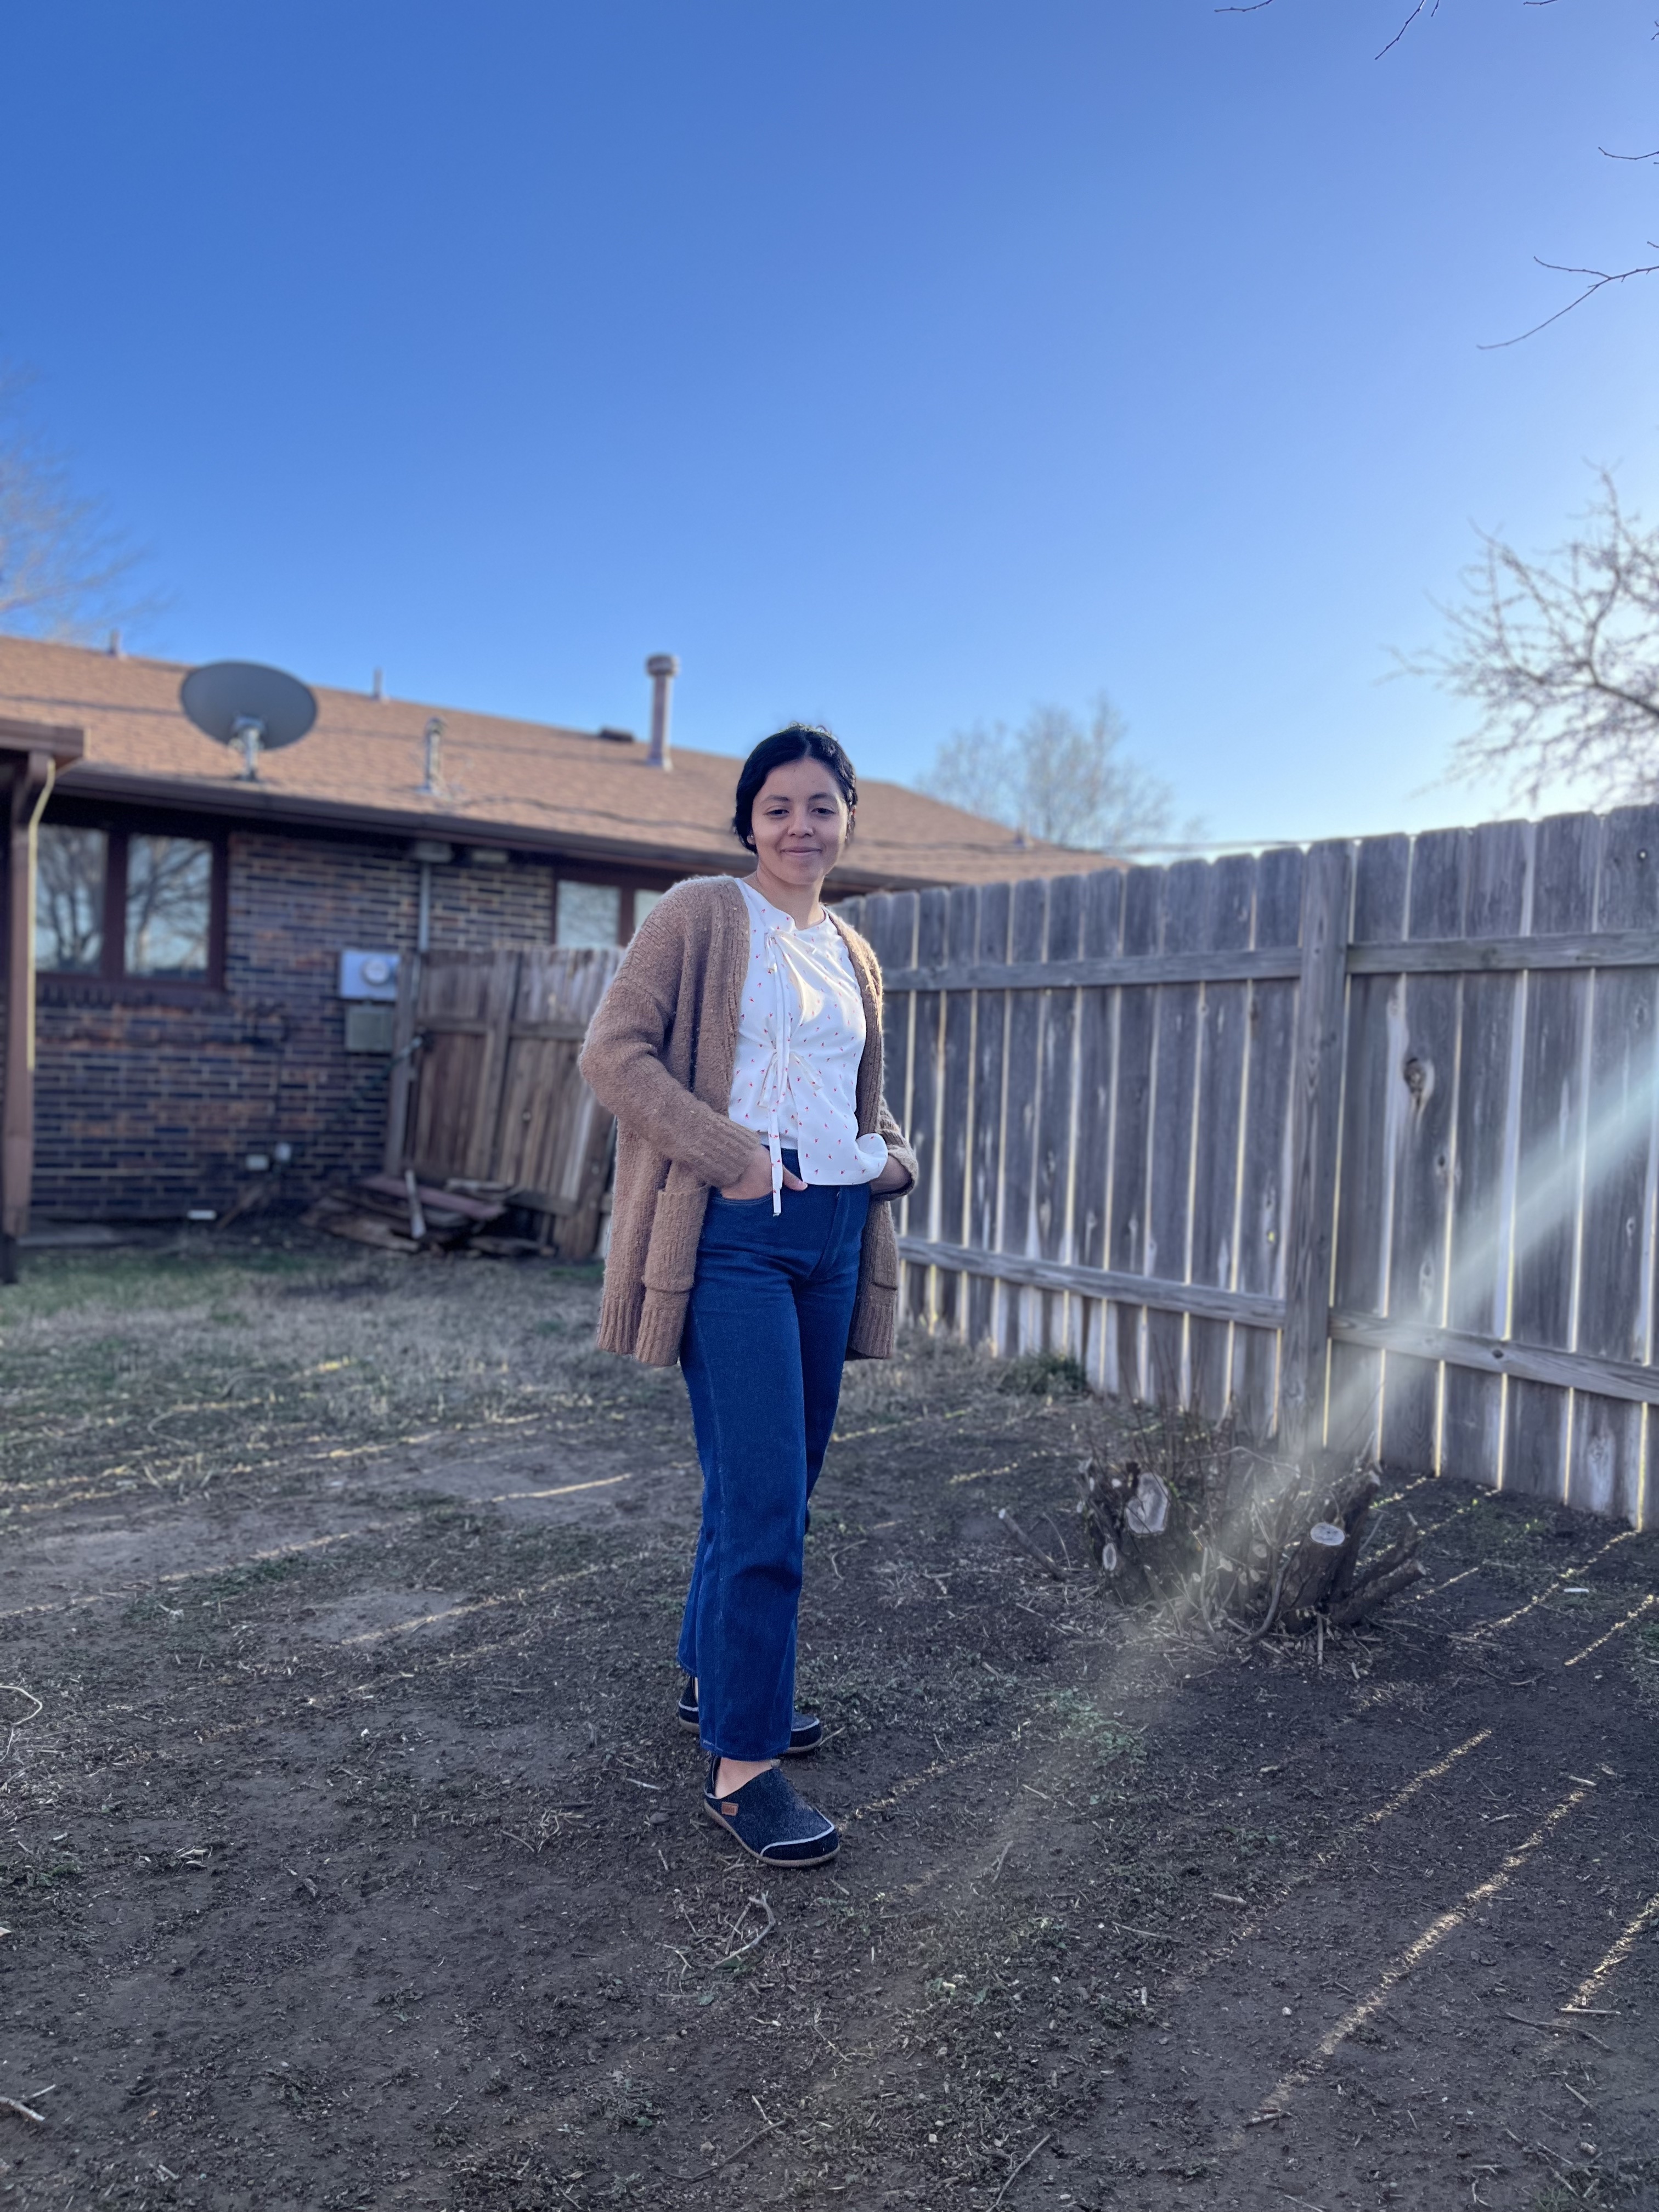
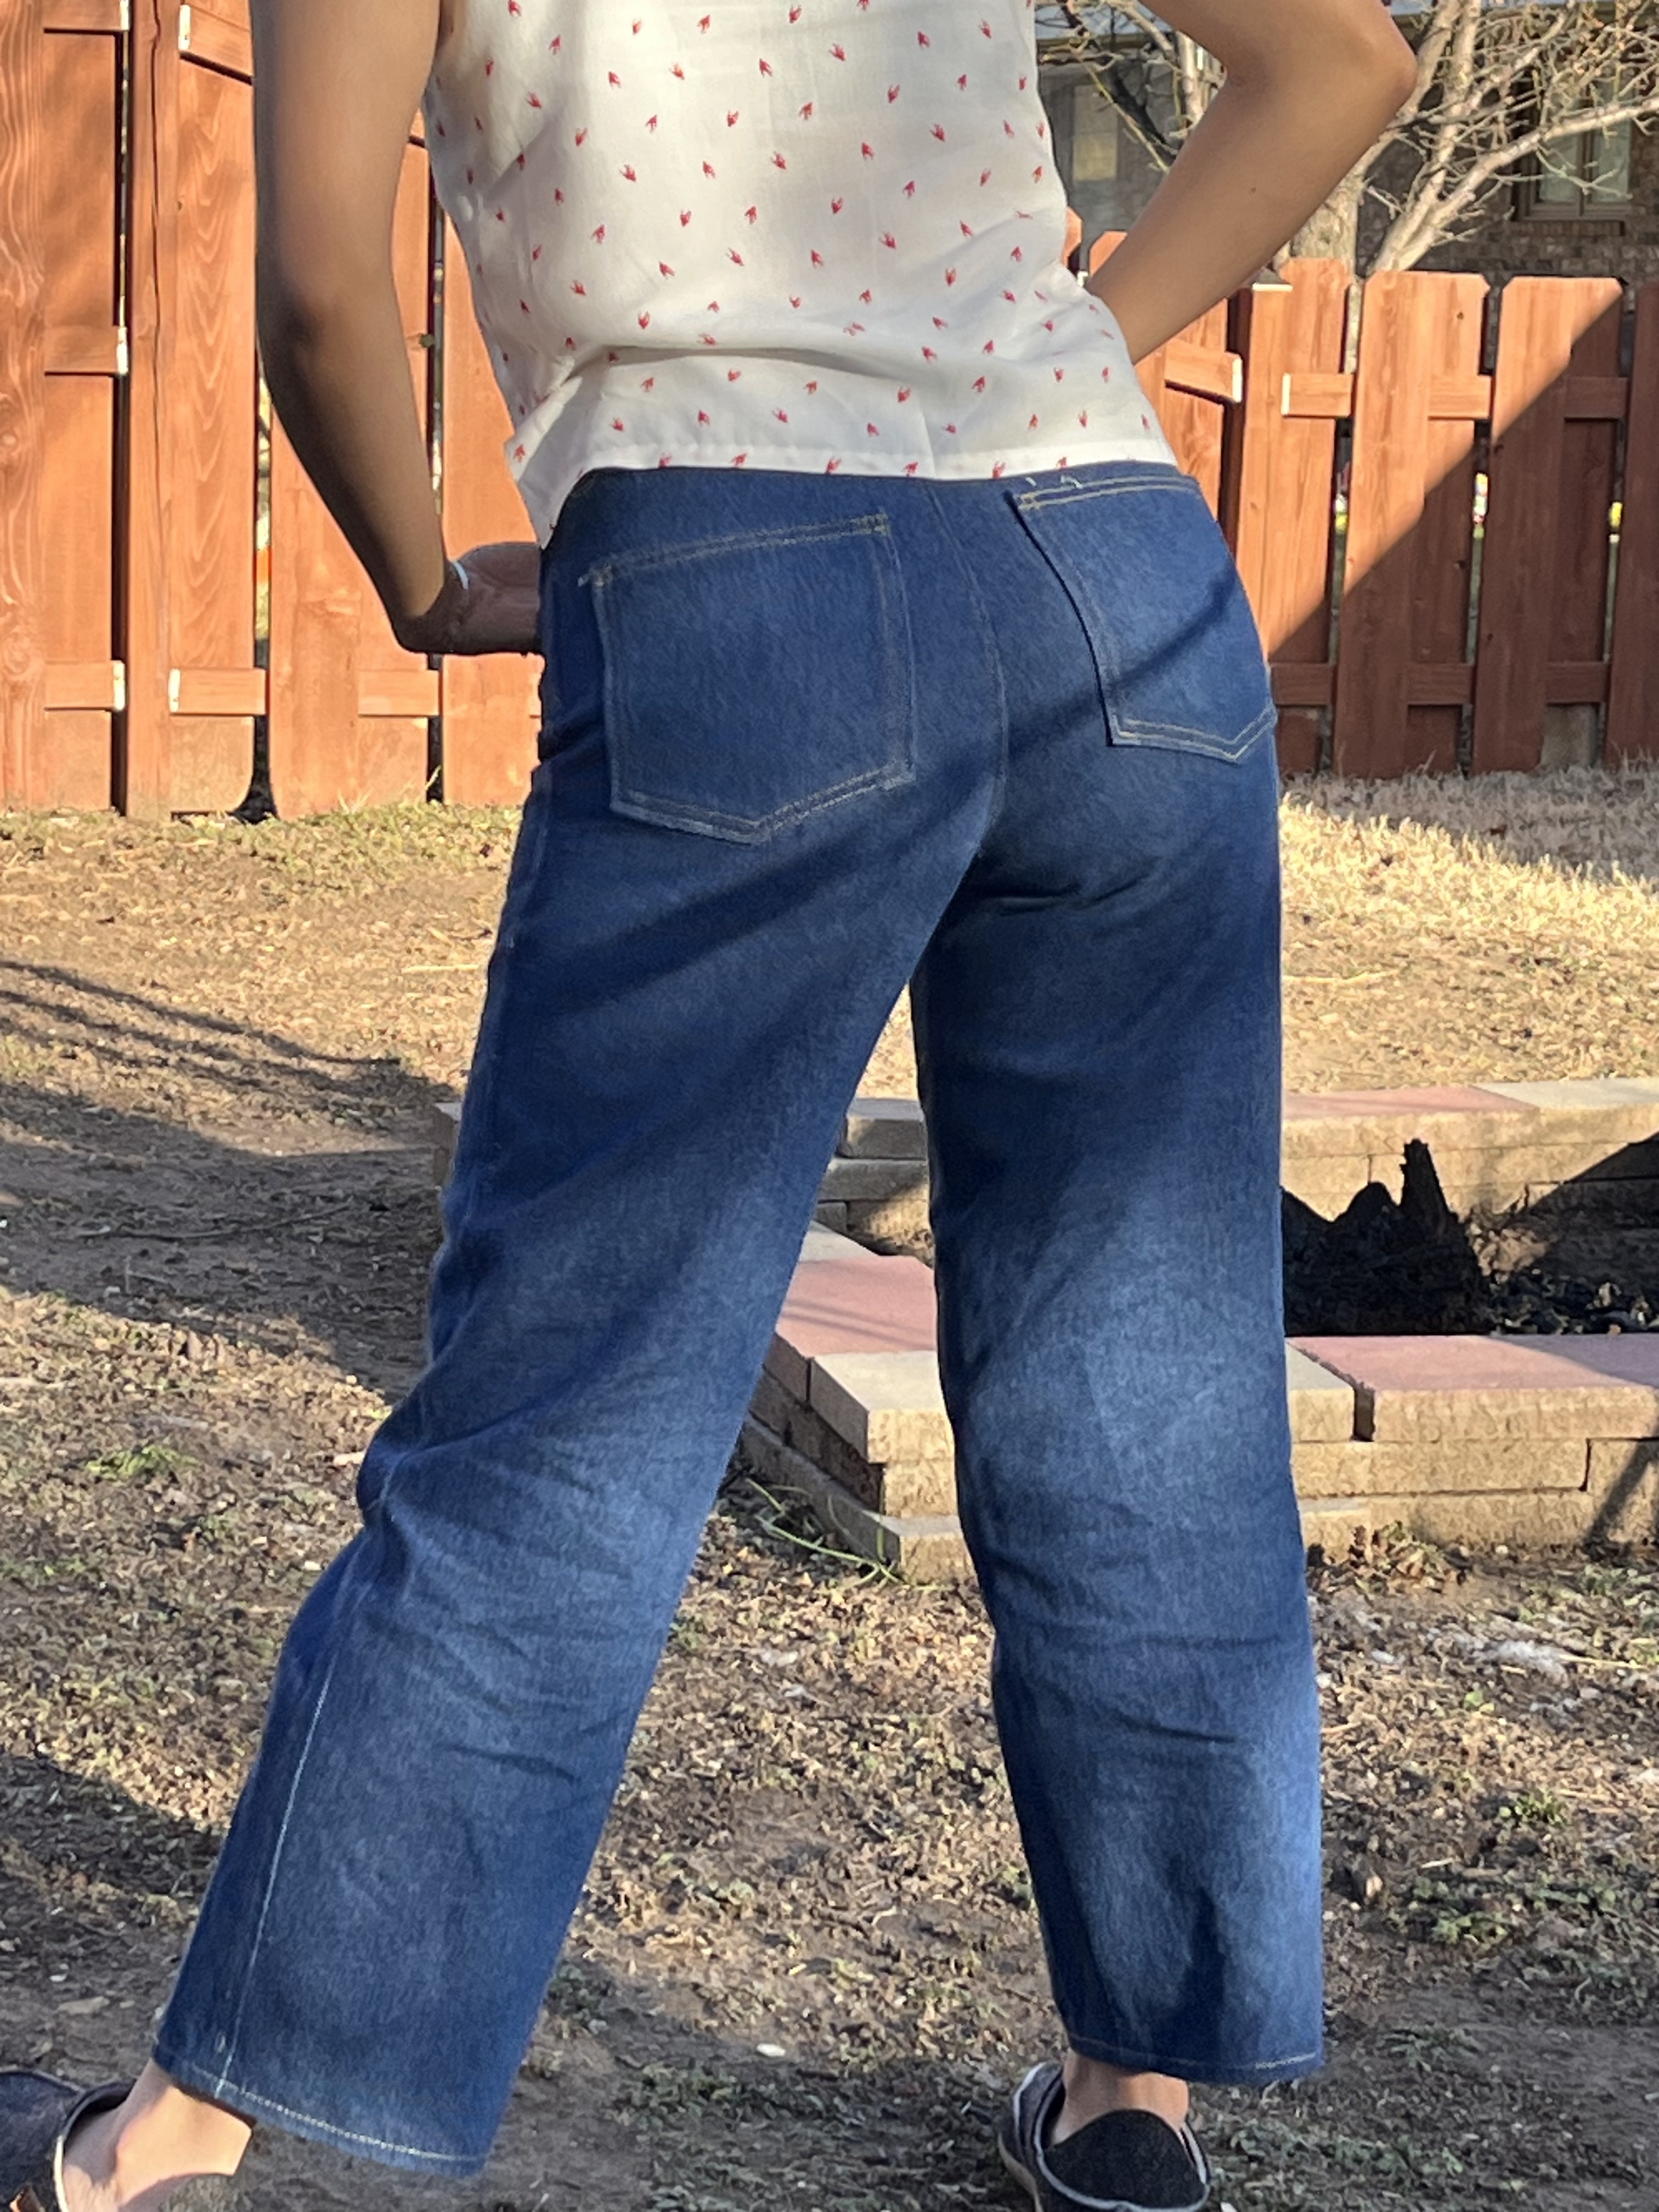
ultimatly, I am proud of myself for completing this giant project. As I have been wearing these pants at least twice a week, I have noticed that there are things I would like to change and improve on for my next pair of jeans. The first would be leaving more lengths on the pants; I realized that after I washed it, it shrunk just a smidge which is not horrible but not what I had wanted. The second thing would be the under-butt lines, the intake i made on the inner seam did not solve my issues and after wearing the jeans once after a wash, the draglines return. Lastly, I would just like to add fancier touches to the construction, such as flat-felled seams and instead of serging seams actually cover them in a contracting fabric to add pizzazz…overall I give this a 3/5 pickles!

Leave a comment