
how did it start?
As I was browsing through Pinterest looking for inspiration on what my next project should be, I stumbled upon this mustard shirt dress by Olive Clothing, and I couldn’t get it out of my head for the next couple of days. I liked how the top was oversized and draped but the skirt was tighter around the body and because of this you could easily define the waist. As I searched for a pattern in my stash that could resemble this dress, I realized I would need to replicate the pattern as best as I could in order to create this beautiful dress.
I made my way to my favorite thrift store to find a fabric that could resemble the original dress and would render enough yardage. I ended up finding a 4 yard roll of light cotton fabric with a blue print…I knew I had found it. Now the challenge began:

DISCLAIMER: The purpose of creating this garment is to learn pattern drafting and gather inspiration through the design. The garments featured on their websites are indeed exquisite; however, due to my current financial situation, I am unable to afford them. It is important to note that I am in no way asserting that the design is my own creation. Additionally, this pattern tutorial is not intended for commercial purposes.
the challenge of pattern drafting:
front and sleeve
I began by visiting the product page of the dress and noticed they had measurement details of the dress. I could tell that the top was really oversized because of the deep pleats in the front and it had “batwing” style sleeves.
Before I could get to creating my pattern, I needed to take some key measurements and if you’re thinking of making this dress, this is what you’ll need:
Disclaimer: I understand that sharing my measurements can help you visualize how I created the dress. However, it’s important to note that precise measurements are essential when creating a pattern that matches your desired style. Remember, beauty comes in all sizes, and a mere number does not define anything. It simply offers numerical information. Wishing you joyous sewing adventures!
- (A) Shoulder/Neck to waist measurement (16 inches)
- (B) Arm length from neck to desired length (24 inches)
- (B) Diameter of hand (12 inches)
- (C) Waist measurement (26 inches)
- (C) Hips measurement (35 inches)
- (D) Waist to mid-calf (29 inches)
- (E) Waist to Hips measurement (9 inches)
And, the most important thing is, you gotta get use a heavy fabric, but it should still be able to drape and flowy so that the top can just drop and create this cool drop effect.

I started off by using this awesome pattern that I always use for making super snug stretchy shirts, called the Grainline Studio Lark Tee #11006. But hey, if you don’t have that pattern handy, no worries! Just grab a fitted shirt from your closet and go with that. Next step, I traced the front piece of the pattern, but only half of it. Then I marked the distance between the neckline and the waist.
I put the folded sleeve pattern on top of the front pattern and matched up the shoulders, angling it kinda horizontally to the shoulder seam (look at the picture). Then, I drew the outer seam of the sleeve and measured from the shoulder to where I wanted the sleeve to end (then add an extra 2 inches for the seam finish). Next, I figured out half of my hand’s diameter, added it to the bottom of the sleeve, and made sure it was perpendicular (don’t forget to square it off). Check out illustration 1.2 for reference.
After slapping on the sleeve and drawing around it, the next task was figuring out how much extra fabric I needed to copy the fancy draping of the top. The dress’s description said it only came in one size, and the bust was 54 cm (that’s 21 inches for you non-metric folks). But honestly, I couldn’t tell if that meant there was an extra 54 cm or just a total of 54 cm on the front. Either way, it sounded like there was plenty of room to work with. So, I made the executive decision to add a whopping 6 inches to the bottom of my top pattern. Easy peasy!
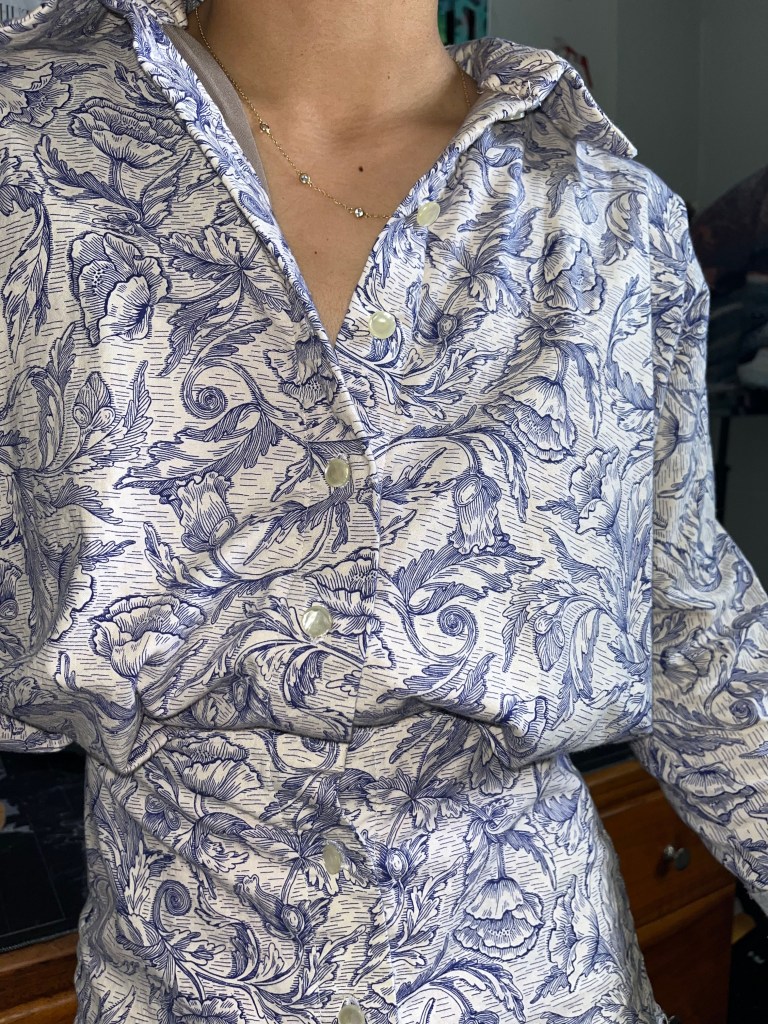
So, I started by drawing a line straight up from the bottom edge to the top and did the same thing with the remaining sleeve line. Once those lines met, I grabbed my trusty French curve ruler and started tracing a curve from the sleeve down to the bottom of the top. But hey, if you don’t have a French curve ruler, just eyeball it, no biggie – you won’t even notice once we stitch the garment together. (insert picture). This curve is what gives the sleeve that cool ‘Batwing’ style. With all the lines linked up, I moved on to the button packet. Now, I’m not one to do a ton of research when I’m doing my own thing, I just go with what feels right to me, even if I might be off track. After a few trial and error sessions with my toile, I added ¾ inches to the front center and then threw in an extra 1 ¾ inches for the fold-over of the placket.
After completing the pattern, I checked my waist measurement and divided it by 4 (26/4 = 6.5 inches). Next, I measured the width of my patterns and subtracted them from the waist measurement (12.5 – 6.5 = 6 inches). This 6 inches represents the amount of fabric I needed for my pleats. I wanted to have 2 pleats, so I divided 6 by 2, which gave me 3 inches. I then located the halfway point and drew a line 1 inch away from the center on both sides. Following that, I drew another line 2.5 inches away from the 1 inch mark on both sides, ensuring that the darts “mouth” would face towards the button placket.
Now all I had to do was add some seam allowance – I went for a cool 2 cm on every seam. I thought it would be perfect since I was going for a French seam finish. Of course, you can choose whatever seam allowance floats your boat, depending on how you plan to finish up your seams in the end.
back pattern
At long last the front has been drafted and now, I head to the back, which was pretty simple. Since the back of the dress doesn’t need anything special, after tracing the pattern for the back, I just placed my top front pattern and aligned the original center seams of both the front and back and traced the rest of the pattern (sleeves, pleats and bottom placket) with seam allowances included.
Skirt pattern
Next up was the skirt, another piece that was a breeze (I’m saying it now because I’ve learned from my own mistakes, but hey, now you don’t have to). Grab your top pattern, trace the bottom section (without the seam allowance), and carefully measure and mark the distance from your waist to your hips on the center seam. Then, from the center seam at your hips, measure outward and mark your hip measurement.
Next came the skirt, another easy draft ( I say that now because I learned from the mistakes I made). Grab your top pattern, trace the bottom section, including the button placket, but not the seams allowances. Carefully measure and mark the distance from your waist to your hips on the center seam. Then, divide the hips measurement by 4 (35/4 = 8.75 inches) and from the center seam at your hips, measure outward and mark your hip measurement (do not include the button placket). Then I just connected my outer waist and hips measurements together with a straight ruler and drew a straight line downwards at my hips until the desired skirt length. I went back with a French curve ruler and curved the waist to hip line.
If you don’t have a fancy French curve ruler, no worries! Just do this simple trick: measure halfway between your waist and hip, divide that number by four, mark that spot on the pattern, and then connect the marks with a smooth curve line as best you can. Easy peasy!
Finally, I added an extra 2 inches to the bottom of the skirt to create a fold. I also included a 2cm seam allowance for the rest of the seams. For the back pattern, I just took the front skirt pattern, folded away the button placket and used it.
Note: I added a collar to the dress, but the pattern came from another pattern I bought for a button-up shirt. If you don’t have anything in your pattern stash that you could re-use, make sure to check out the resources I’ve included at the bottom for making a collar.
Sewing time
Now it’s time to stitch everything up. First, I tackled the pleats, ensuring that I stay-stitched them in the desired direction. Since I opted for French seams, I placed all the pattern pieces together with the wrong sides facing each other. I sewed in 1 cm, trimmed half of it, and pressed it closed. Then, I flipped the pieces right-sides together and sewed in another 1 cm. This technique allowed me to avoid zig-zagging the edges. I repeated this process for the top, leaving the button placket as is. The skirt followed the same approach.
You’re probably wondering if I’m gonna bother with hemming my sleeves, and the answer is no. I usually leave at least one part of my outfit unfinished and this started out by accident just ’cause I was too excited to wear it. But now it’s become a little “Yelmy” quirky detail for a bit of fun. Of course, if you want, you can totally finish off your sleeve seam by folding it in and giving it a good stitch. So it’s really up to you!
For the joining of the top and skirt, I joined the right-sides together and stitched them, then finished them off by serging the edge. I kept thinking that I should have done a french seam but the more I think about it, I feel like it would have been too bulky because of all the layers of fabric. But if your fabric doesn’t have as many layers as mine at the end, give it a try and french seam or use another technique, the sky’s the limit and if it doesn’t work out… Oh well, you live and you learn, right?
Next I hemmed the skirt. First, I folded the edge inward by half an inch, and then I folded it inward again by 1 ½ inches (you can adjust the folding ratio according to your desired hem width). I sewed it in place. Next, I turned my attention to the button placket. To begin, I cut two rectangles of interfacing measuring 1 ¾” by 15″ (depending on the length of your skirt you can adjust how far you want the interfacing to go), which I positioned on the wrong side of the plackets. After what felt like an eternity, I folded the edge of the placket inward by half an inch, and then by 1 ¼ inches. Finally, I stitched it at the edge of the inward fold.
Following the instructions of my collar pattern, I popped the collar on my dress and stitched it down. The final touch was adding the buttons. I didn’t want to go overboard with the buttons, but I knew I needed enough to keep things covered. I put one button at the top of the button placket, and then about 2 inches away I placed the next one. I kept doing this until I was happy with the result.
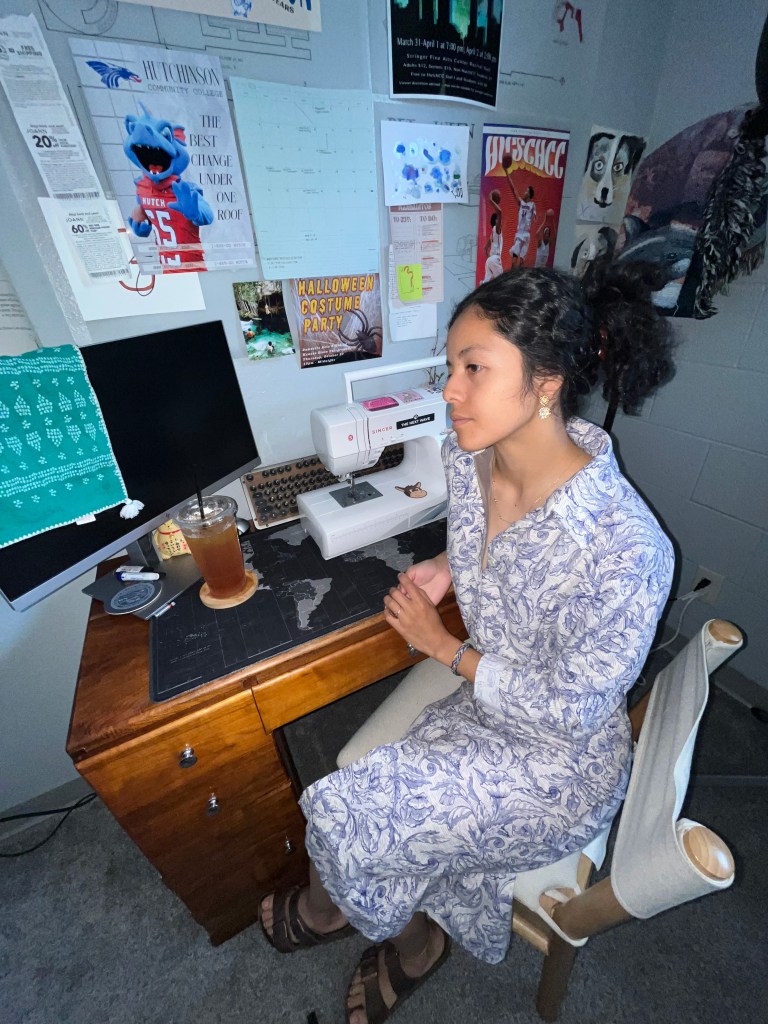
the results
I hope you had a wonderful time following this tutorial. If you decide to give it a try, don’t forget to tag me on Instagram using #yelmos_world. I am looking forward to seeing the unique designs you come up with!
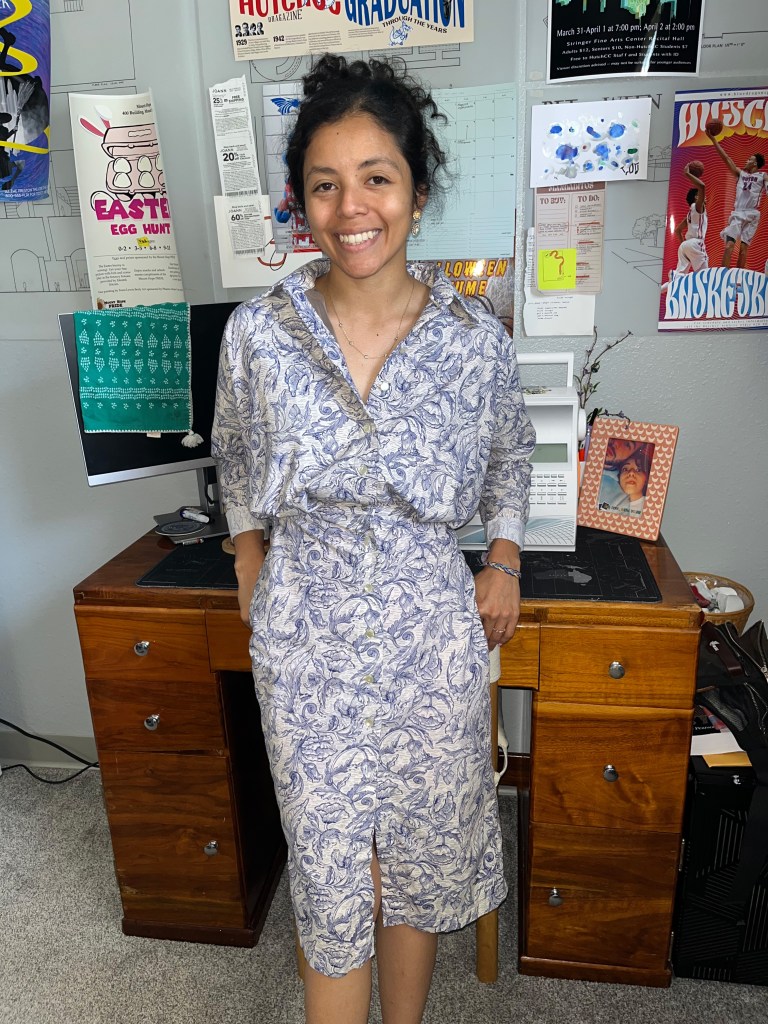
Final notes: The dress turned out amazing and way better than I hoped, but here are the things that I would change for next time:
- use a heavier fabric so the fabric doesn’t puff up at the waist.
- add an elastic at the waistline create a tighter fit, or add strings on the side seams to create the desired fit.
- use a 0 stretch fabric. The fabric used for this dress was cotton and with time it tends to stretch and lose its tightness.
Collar Resources:
https://blog.fabrics-store.com/2017/09/05/sewing-glossary-how-to-draft-and-sew-a-shirt-collar-tutorial/
https://dresspatternmaking.com/garment-elements/collars/basic-collar/

Leave a comment